Change Timeline Visualization to Feature Other Data
In some instances, you may have other data that is a natural fit for the Timeline visualization (for instance, we once used it to visualize depth!)
In order to change the type of information the Timeline displays, you’ll need to change a variable in the liquid code in the “timeline.html” file, contained in the “_layouts” folder.
Change the Field Generating the Timeline
Note: You can choose any field to add to this visualization, but if the field’s datatype is “text” (rather than “integer”), you’ll need to start with the steps in this section, and then move on to the instructions below to include a text field.
- Navigate to the “_layouts” directory, and open the “timeline.html” file.
- On the second line of code in the “timeline.html” file, change the value for “map” from “date” to another metadata field that you’d like to represent.
- The line you should change looks like this:
{%- assign raw-dates = site.data[site.metadata] | map: 'date' | compact | uniq -%}
If we were changing it to map the field depth, it would then look this:
{%- assign raw-dates = site.data[site.metadata] | map: 'depth' | compact | uniq -%}
We’ll use depth as our example for the steps below. You can refer to the depth visualization as an example, and check out the code in the revised “timeline.html” layout that we used to create it.
Connect Your New Field to the Output
You’ll need to make one more change to ensure that your new field (in our case, depth) can generate the visualization.
- To do this, you’ll need to search the “timeline.html” file for the Liquid filter “where_exp”. Use
Ctrl + F(PC) orCommand + F(Mac) to open a find and replace textbox in Visual Studio Code. The line you’re looking for should look like this:
{%- assign inYear = items | where_exp: 'item', 'item.date contains year' -%}
- Once you’ve found “where_exp”, change the part after “where_exp” so “item.date contains year” becomes “item.depth contains year”. The end result will be:
{%- assign inYear = items | where_exp: 'item', 'item.depth contains year' -%}
Note: We are keeping the year variable constant here so as not to have to edit all the code and risk messing it up somewhere. You can, however, go through and edit all the year variables on the page to become depth if you like to keep things readable.
Change the Page Title and Navigation to Rename the Timeline Feature
Now that we are looking at another field (in our case, depth) rather than date, we’ll likely want to change the way that the Timeline page is named and linked.
- Edit “_data/config-nav.csv” by removing the line
Timeline,/timeline.htmland replacing it withDepth,/depth.html(or whatever matches up to your new page). - Then navigate to the “pages” directory and open the “timeline.md” markdown file.
- Locate the yaml front matter at the top of the file (the front matter is the
key: valuepairs between two lines of dashes (---)). - You’ll want to edit the front matter values to look like this (replacing
depthwith whichever field you’re using):
---
title: Depth
layout: timeline
permalink: /depth.html
# a timeline visualization will be added below the content in this file
---

## Collection Depth
Change Timeline Visualization to Include Text Values Rather Than Integers
You can also visualize a metadata field with a “text” datatype, instead of an “integer” datatype. You’ll need to follow the instructions above to switch out date for your chosen field, then follow the steps below.
- Find the following line of code in the “timeline.html” file:
{%- assign uniqueYears = clean-years | remove: " " | split: ";" | uniq | sort -%}
- Remove this portion of the code:
| remove: " ", so that the line now looks like this:
{%- assign uniqueYears = clean-years | split: ";" | uniq | sort -%}
Your Timeline visualization will now be based on the text values in your chosen field.
Change Timeline Button Value
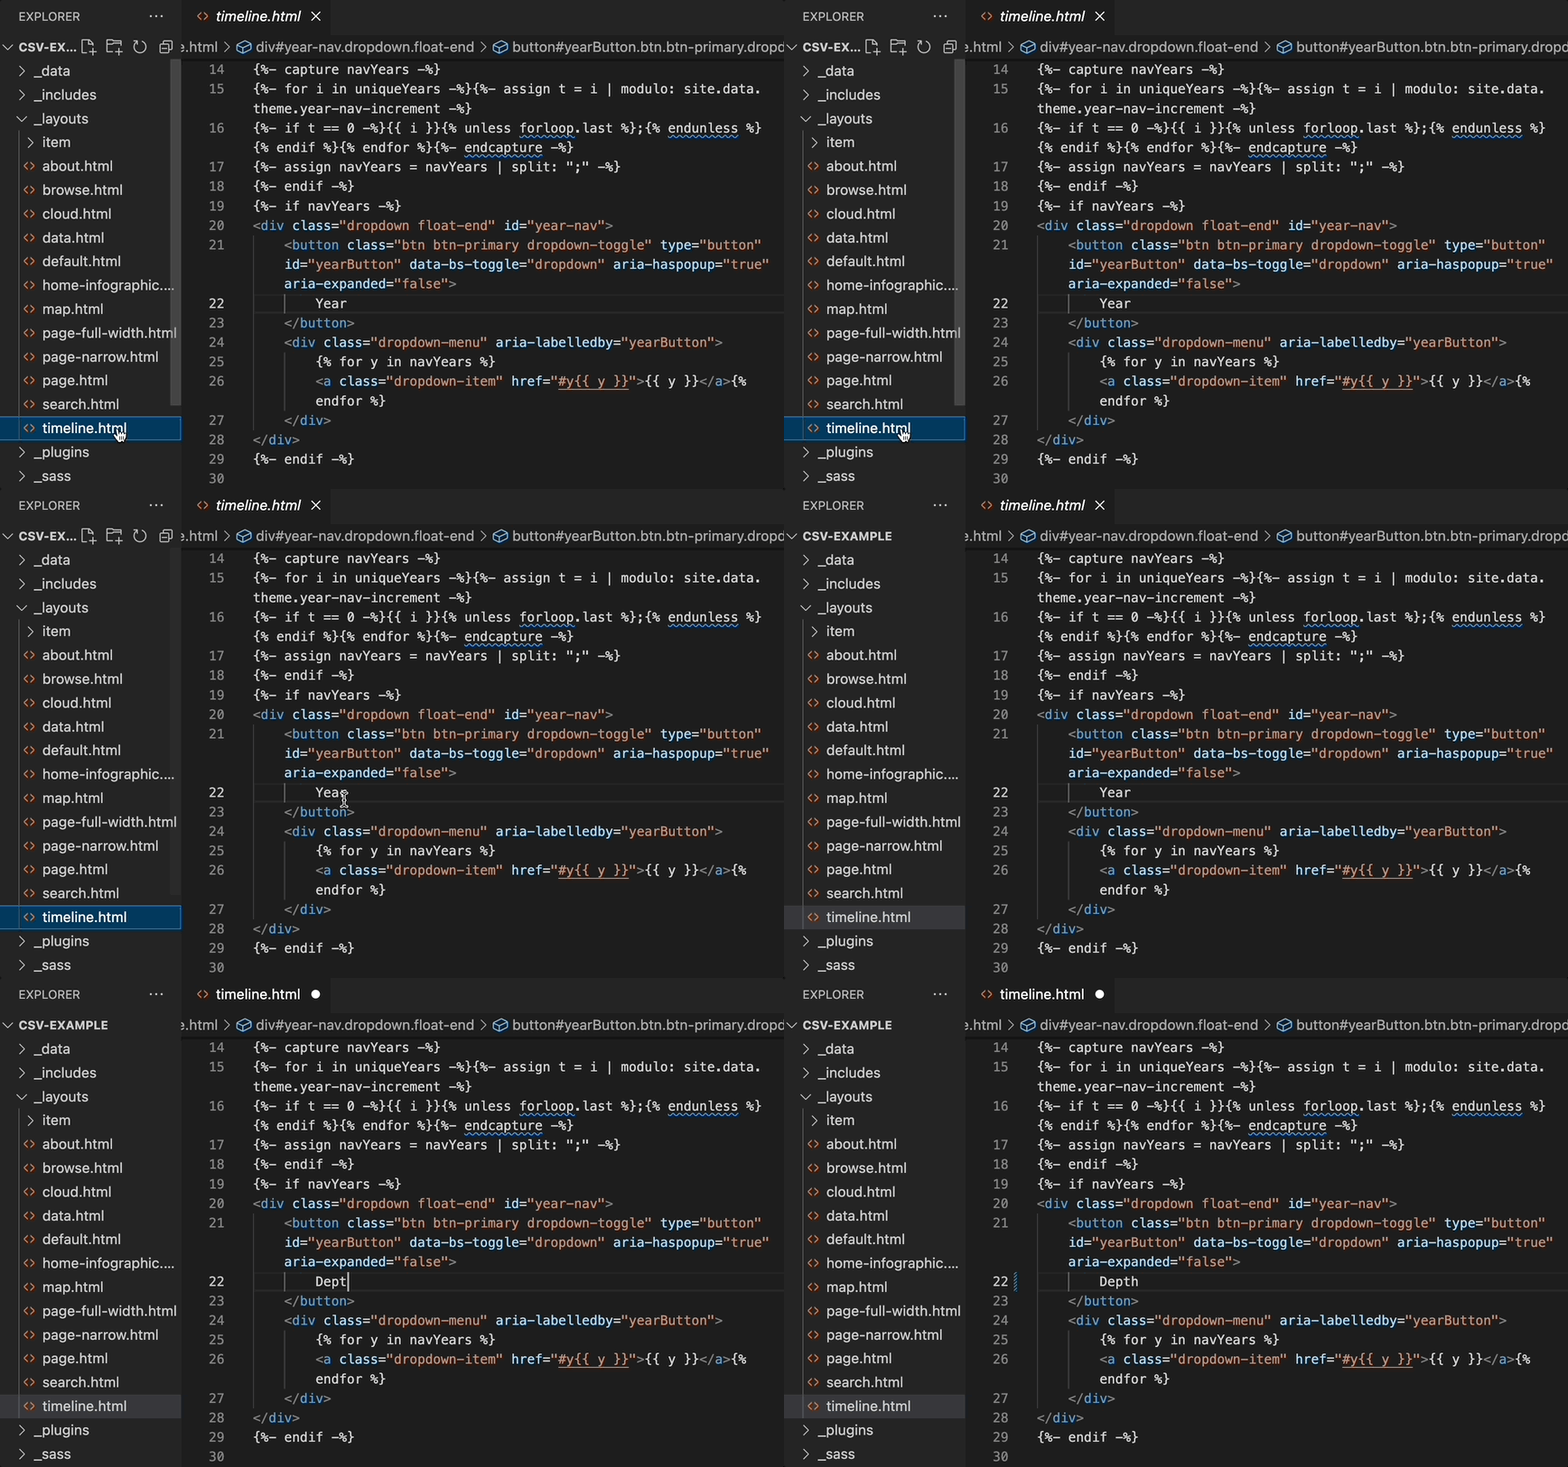
After you follow these instructions, you will still see a blue button that says “Year” on your new timeline page.
To update this, you will need to navigate to the “timeline.html” file in the “_layouts” folder and then change the button value from “Year” to your custom field name (see line 22 of the code).

