Developing a Workflow for Updating Multiple CollectionBuilder Collections
The below is excerpted from our 2020 article on CollectionBuilder-CONTENTdm in Code4Lib Journal.
How We Use CollectionBuilder
We started using CollectionBuilder in earnest to develop our digital collections at the end of 2018, using an agile ‘sprint’ in the Data and Digital Services Department at the University of Idaho Library to jump start the creation of the necessary data and design files. Although this early version of CollectionBuilder was not fully developed, our team was able to prepare the metadata, configuration files, and textual content. Since this data (literally the collection as data) is independent of the CollectionBuilder template, the implementation of visualizations and infrastructure could continue to develop and evolve separately, much like a WordPress theme. Due to staffing issues, we did not return to applying CollectionBuilder to our own collections in earnest again until the summer of 2019, during which we solidified our workflow for building and updating all of our digital collections.
Currently, we use CollectionBuilder via a Git/GitHub focused workflow to develop our digital collections in an open, collaborative way with librarians and staff at the University of Idaho Library. The code for all collections is contained in a single GitHub repository with the master branch representing the generic template. Each individual collection is developed in a new branch within the repository, allowing us to create unique sites while maintaining a central codebase. This approach helps us to keep the underlying code up-to-date with improvements we often make while retaining each collection’s individual customizations and commit history that details the changes that were made.
The basic workflow moves through seven areas of activity:
Repository Branch Creation (GitHub) In our CollectionBuilder GitHub repository, we create a branch for the collection, using a branch name that corresponds to that collection’s short URL name. For example, the collection https://www.lib.uidaho.edu/digital/barstock/ is developed on a branch named ‘barstock.’
Metadata Extraction/Preparation/Revision We extract a TSV file of the collection’s metadata from CONTENTdm using the export feature on CONTENTdm’s Project Manager tool. We upload this data into Google Sheets, where we check the metadata for errors, correct any field names that need to change (subjects becomes subject, etc.), and add a unique objectid field. Finally, we download the CSV of the document and add it to the _data folder of our branch.
Config File Editing We configure the various files that drive the generation of the site. These include: /_config.yml, where we record which collection and URL we’re building; /_data/theme.yml, which controls the basic configurations for all of our visualizations (map, timeline, word clouds, etc.), data files, and our front page; and a series of “config-(…).csv” files (config-map.csv, config-browse.csv, config-metadata.csv, etc.) that further configure what information shows up on which pages.
Development Server Review We serve up the newly configured site on our computer with the Jekyll serve command (‘jekyll s’). We then examine the website generated for obvious errors and additional visualization or browsing feature possibilities. We often look at the facets.json data file generated by the system (and configured by the theme.yml file) to see if there might be other fields to visualize in a word cloud format, or even a modified timeline.
Build Static Web Files We’ve added a rake command to build our website for production. The command
rake deploybuilds the site for production by running the Jekyll commandJEKYLL_ENV=production jekyll build.The production environment triggers the addition of features left out during development, such as full meta markup and Analytics snippets. This keeps our analytics account clean from server hits, while allowing us to have the code pre-built with an analytics variable in our _config.yml file.Deploy Web Files to Production Server We then copy the files and folders contained in the _site folder and add those files to the correct directory on our production web server.
Push Changes to Git Branch of the Repository If more complicated revisions or additions are being made, we try to push changes several times as we revise the site running on the development server. If the changes are small, however, we just push these changes at the end of the process.
When substantial development changes are made to the master branch code, these are pulled into all of the collection branches. These collections are then rebuilt, deployed, and their updated code is pushed to the repository (Steps 5 through 7). This framework facilitates the rapid development of custom visualizations and features, enabling us to generate unique interfaces for more collections. Low priority collections use the standard template, reaping the benefits of the skin interface without a large investment of time. Meanwhile, higher priority collections can be more quickly developed into unique sites, while still maintaining elements of a common theme and branding. For collections requiring extensive customization, the templates act as recipes that can be quickly adapted to new purposes, without getting too far from the original code base, making maintenance easier.
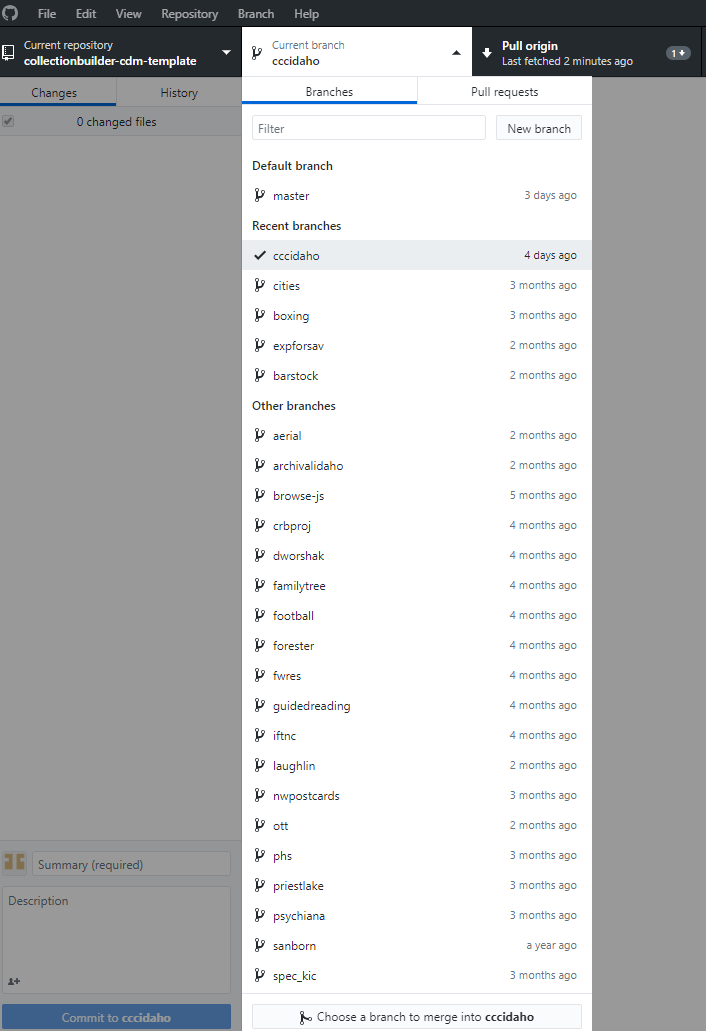
Figure 9. Detail of the branches for our digital collections, as seen listed in a GitHub desktop platform.
Besides being an excellent way to keep our collections’ code up to date, creating and managing our collections on GitHub has also expanded collaborative opportunities, allowing more staff to participate in creating collections and giving them an opportunity to learn from the updates and alterations their colleagues make. More people working on collections makes it easier for us to keep our collections up to date, and any mistakes that might be made by those relatively new to working with our digital collections can be easily reverted by CollectionBuilder’s developers using Git.