Transfer GH to CSV
This walkthrough reviews how to transfer a CollectionBuilder-GH (CB-GH) site to a CollectionBuilder-CSV (CB-CSV) site by copying and pasting folders and files from the CSV Template into your GH Repository and then rebuilding the site using GitHub Actions.
Important Note: We highly recommend that you complete the CSV Walkthrough and the Objects Derivatives Walkthrough before beginning this walkthrough and transferring your CB-GH site to a CB-CSV site.
1. Access your GH Repository in Finder (on Mac) or Explorer (on Windows)
First, you will need to pull down the GH Repository that you want to transfer to CB-CSV using GitHub Desktop.
To do this, navigate to your GH Repository’s home page on the GitHub web interface.
Click on the green button labeled Code. In the box that pops up, click on the button labeled Open with GitHub Desktop. This action will open GitHub Desktop on your computer.

- GitHub Desktop will ask you to confirm the path of the repository you are cloning. Once you click the blue Clone button, GitHub Desktop will create a new folder on your computer with the matching your repository name and clone the contents of the repository from GitHub.
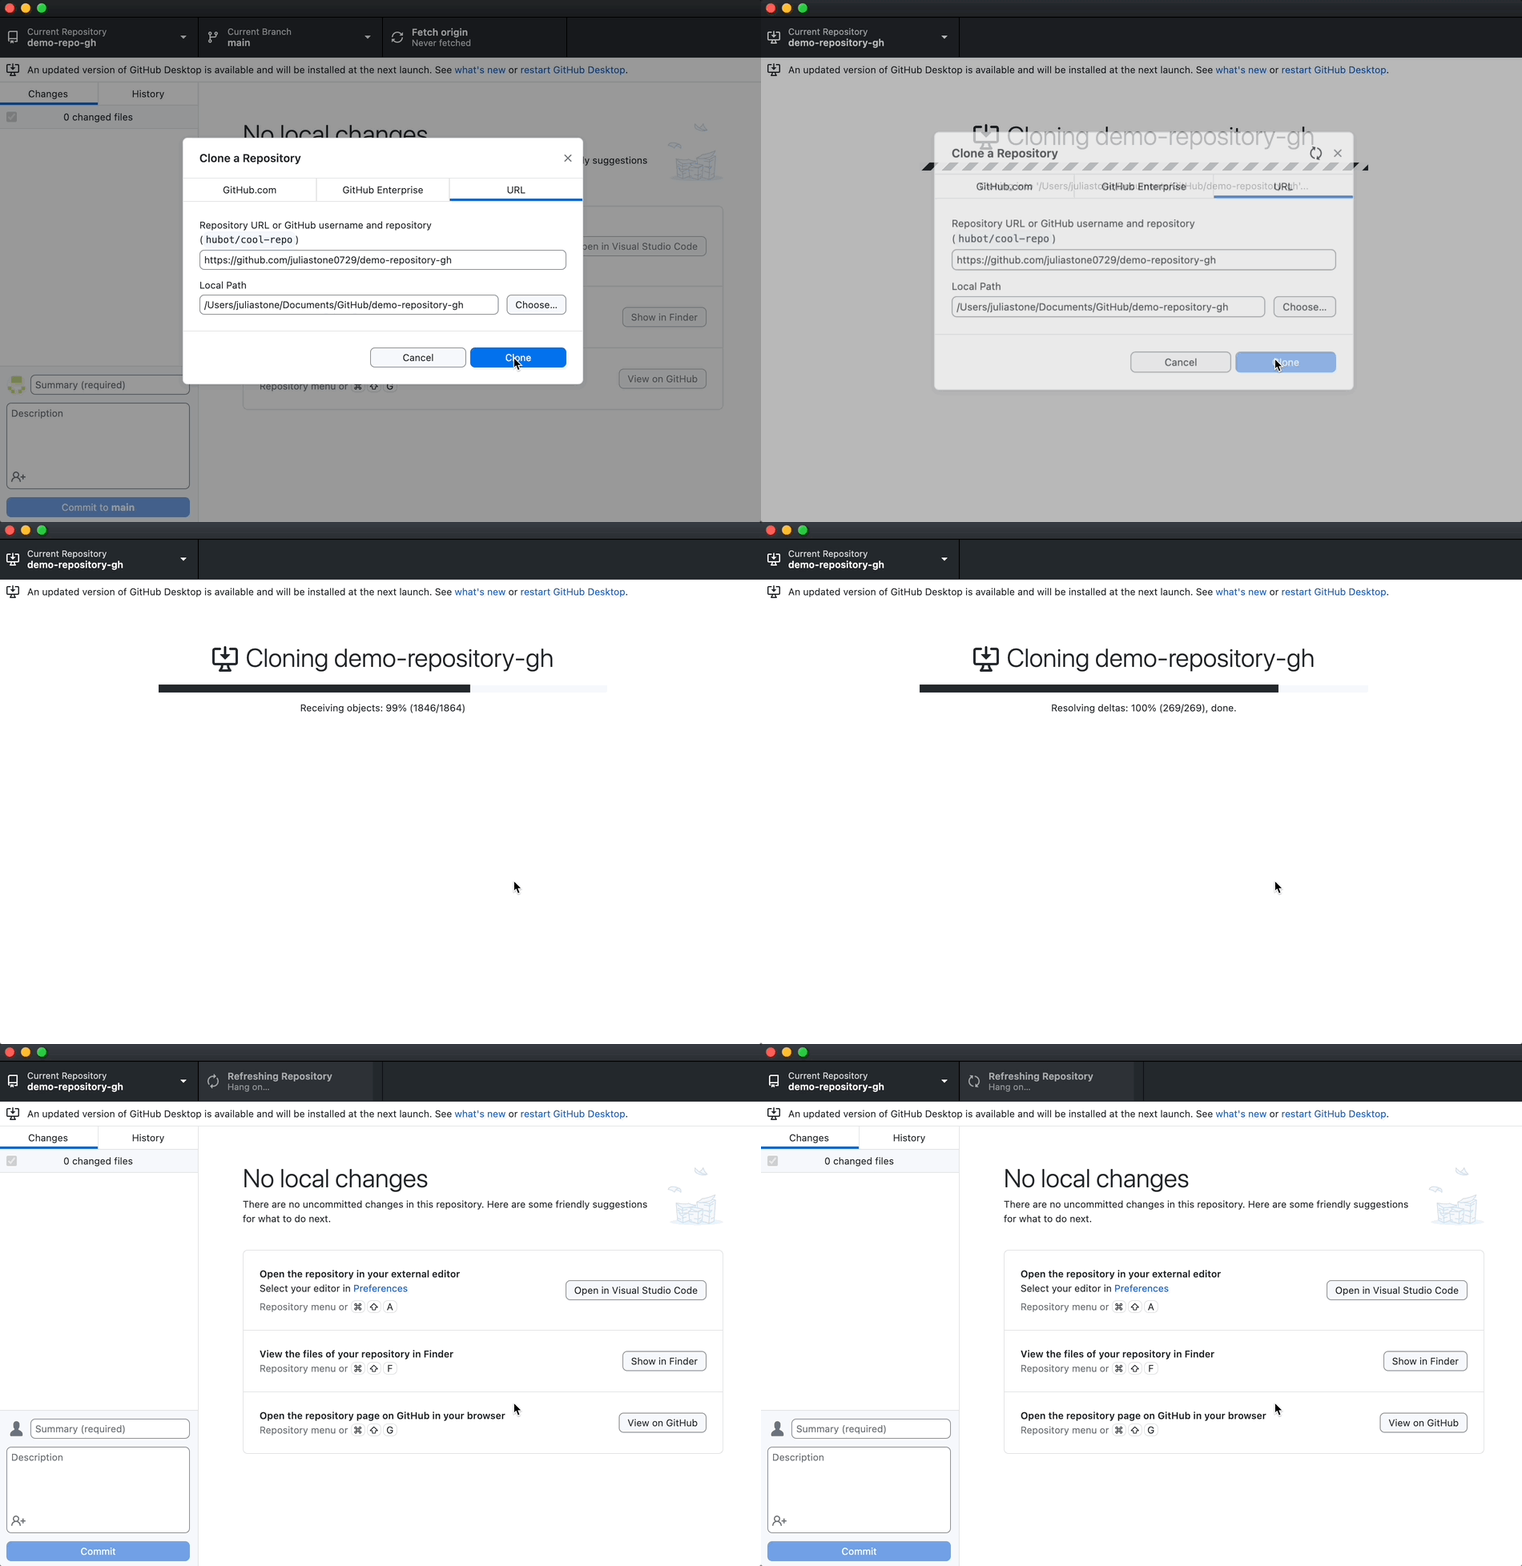
Once the repository is cloned to your local machine via GitHub Desktop, click the Show in Finder button (on Mac) or the Show in Explorer button (on Windows).
- Alternatively, in the top menu, click Repository and then Show in Finder (on Mac) or Show in Explorer (on Windows)
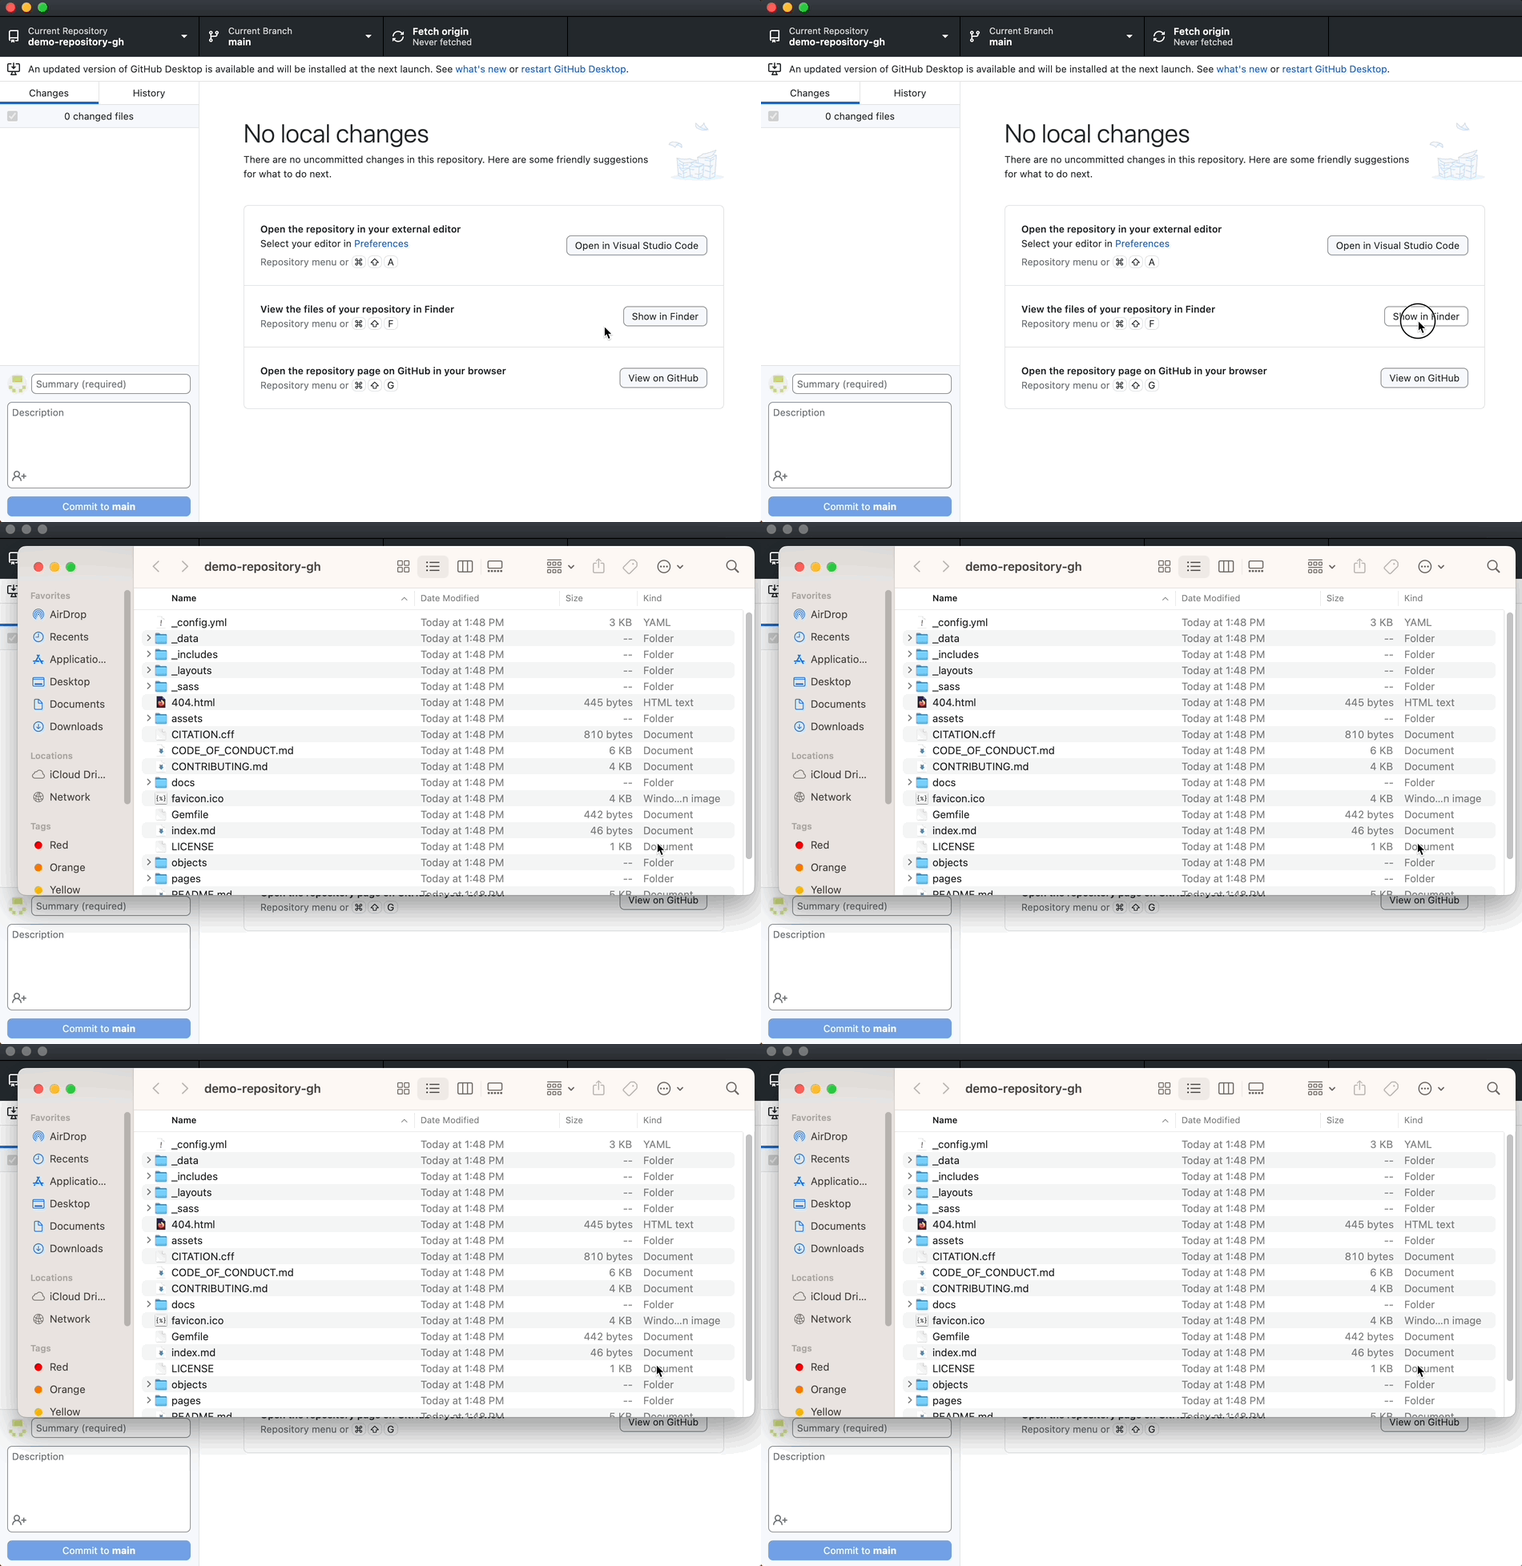
- This will show you the GH Repository as folders of files.
2. Download a CSV Transfer Repository as a ZIP file
- On the CollectionBuilder-CSV template, click the green Code button and then Download ZIP.
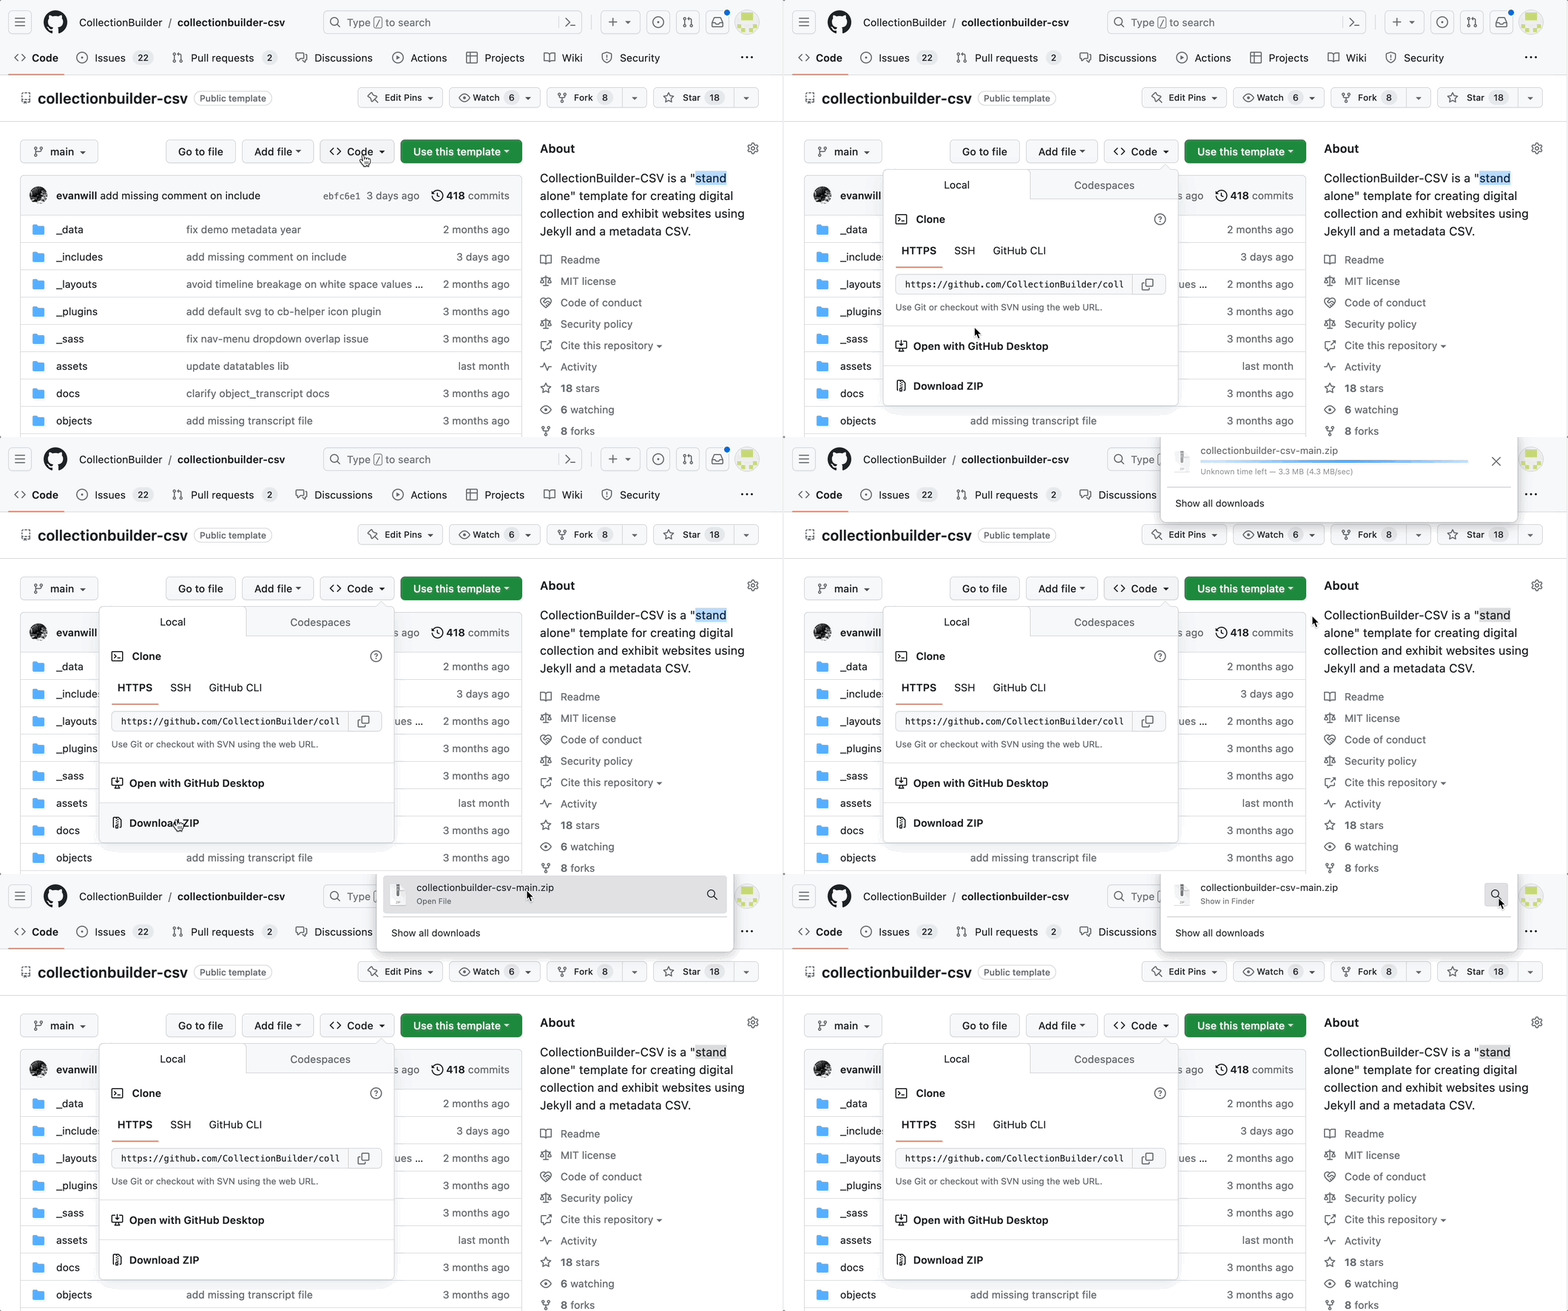
Expand the ZIP file by double clicking on it.
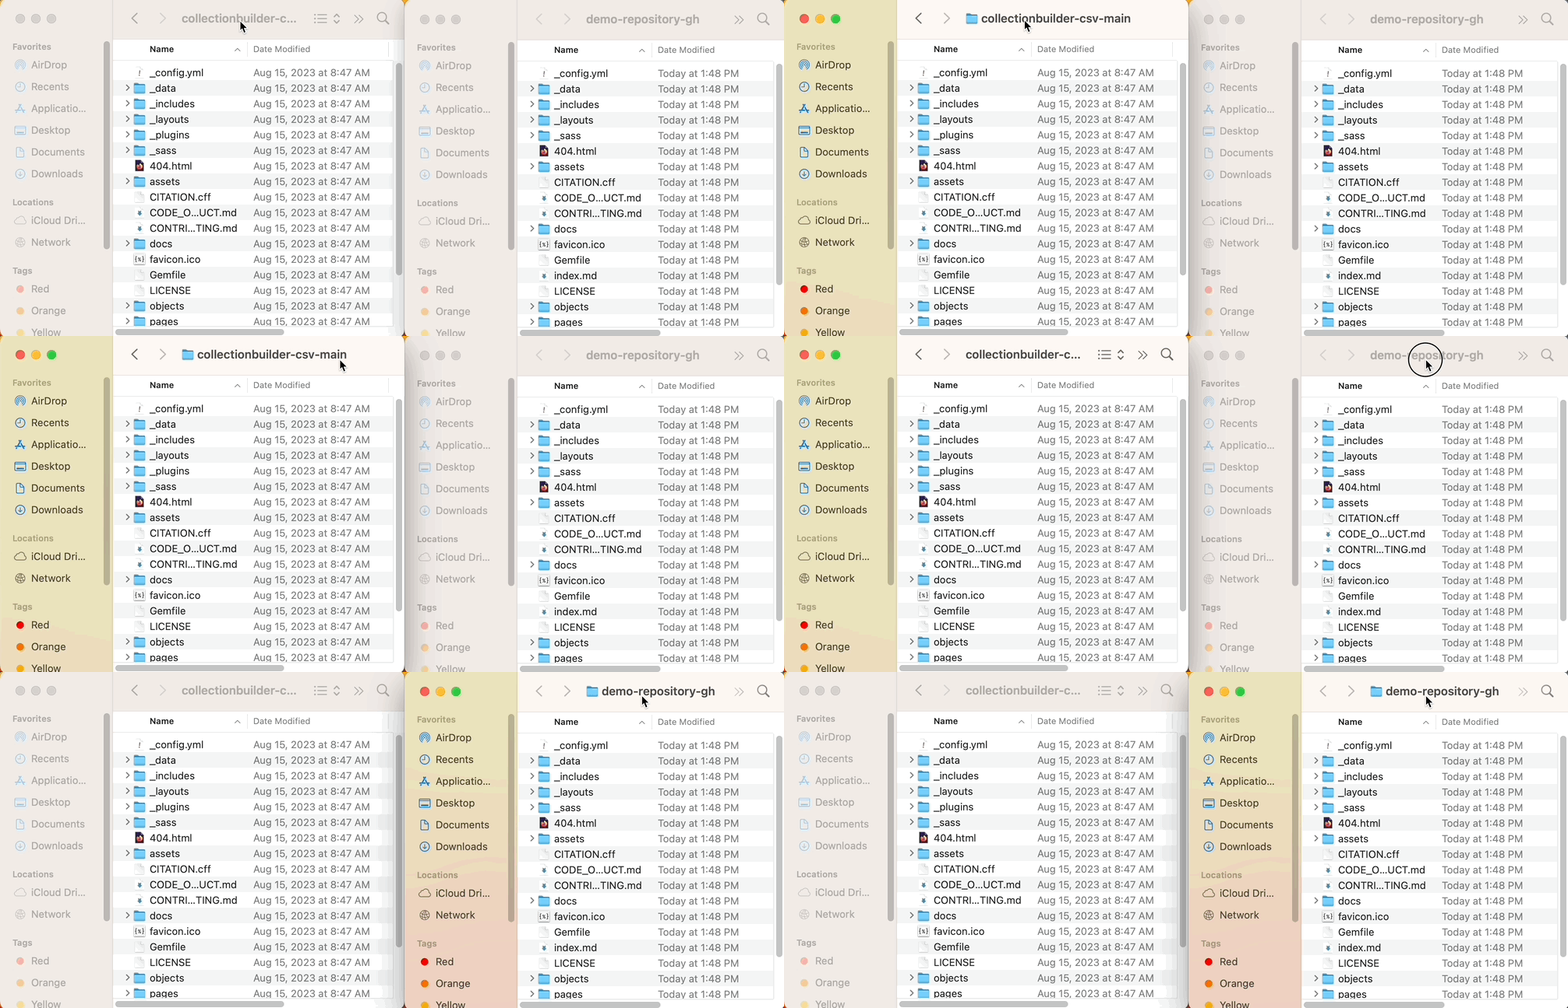
Now, you should have both the CSV Transfer Repository and the GH Repository open in Finder or Explorer.
3. Check your commit history to see which files have been changed
Before you begin transferring files, look in your commit history of your GH Repository to see which files you have changed.
To view your commit history, click on commits (i.e., the clock icon) located in the <> Code section of your repository.
You can click on a commit message to see which file you changed. These will be the files that you keep in the repository. Do not replace these files with files from the CSV Transfer Repository.
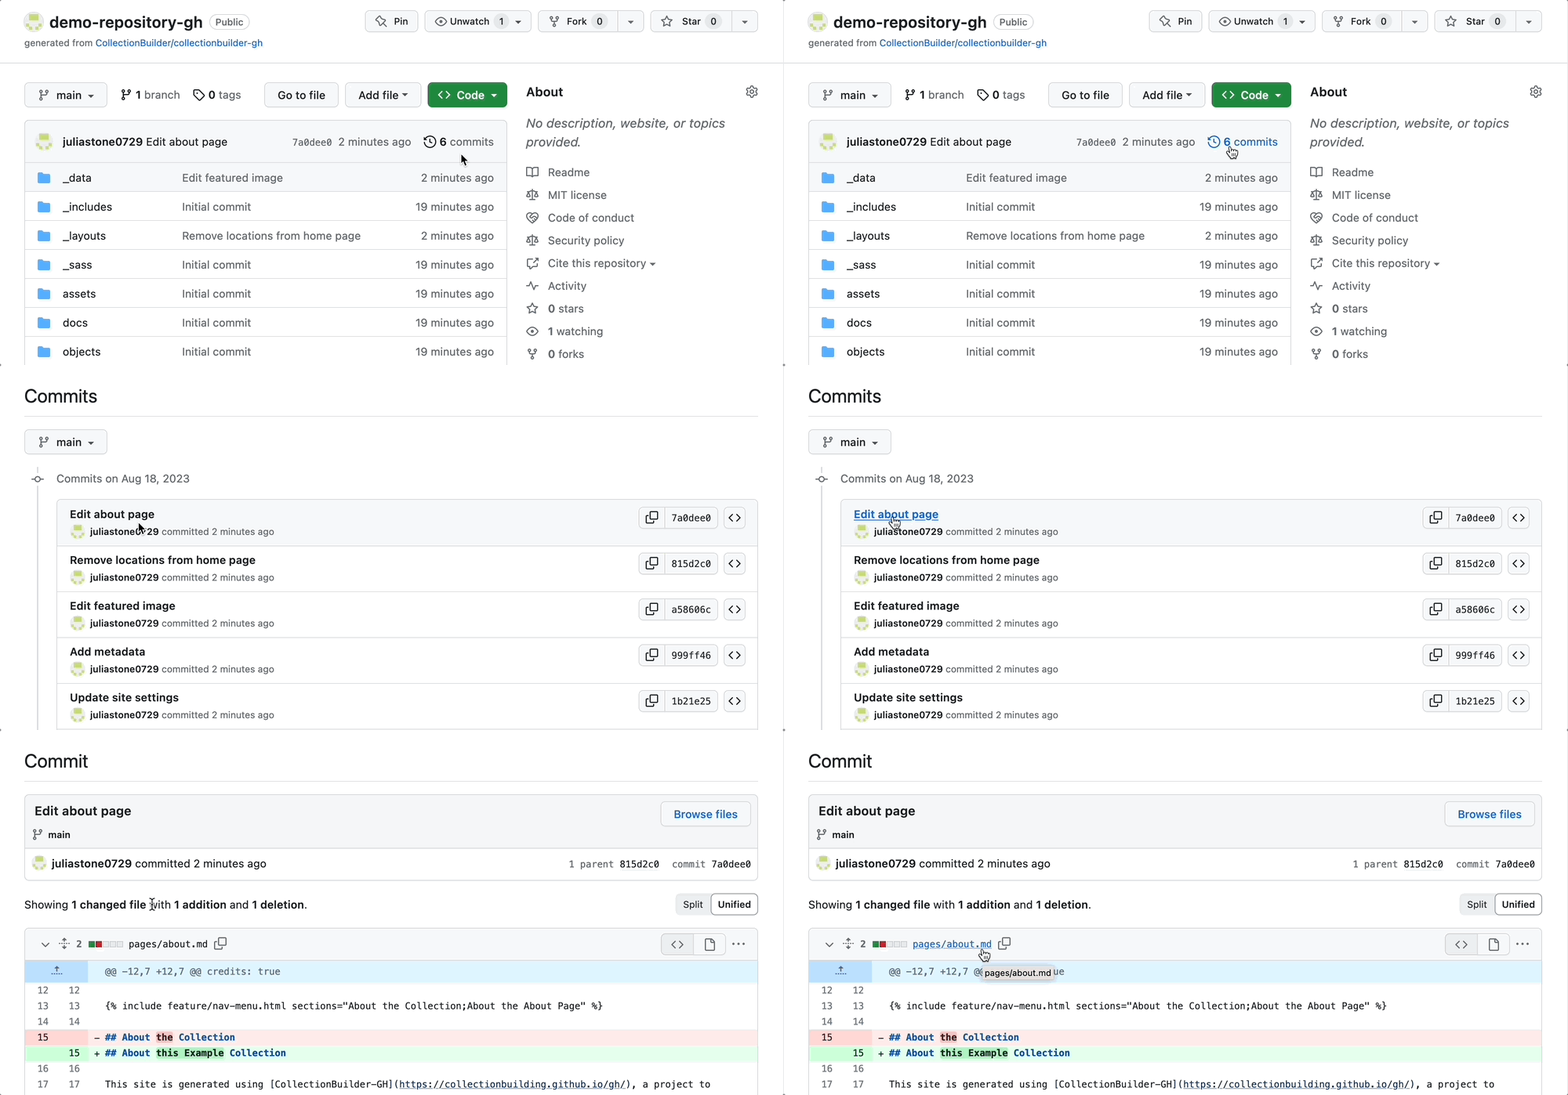
- Files to Keep: Usually files like about.md and home-infographic.html may have been changed. In addition to any files that you have changed, make sure to leave the config.yml file and all the files in the _data folder and objects folder. You may also want to leave some files from the assets/img folder, such as organization logos, etc.
4. Transfer files from the CSV Transfer Repository to the GH Repository
To make the transfer process easier, put the two Finder or Explorer windows side by side
Now, you can begin dragging folders and files over from the CSV Transfer Repository to the GH Repository.
To select more than one file at a time, hold down Shift. You can select or unselect a single file by holding down Command / Ctrl.
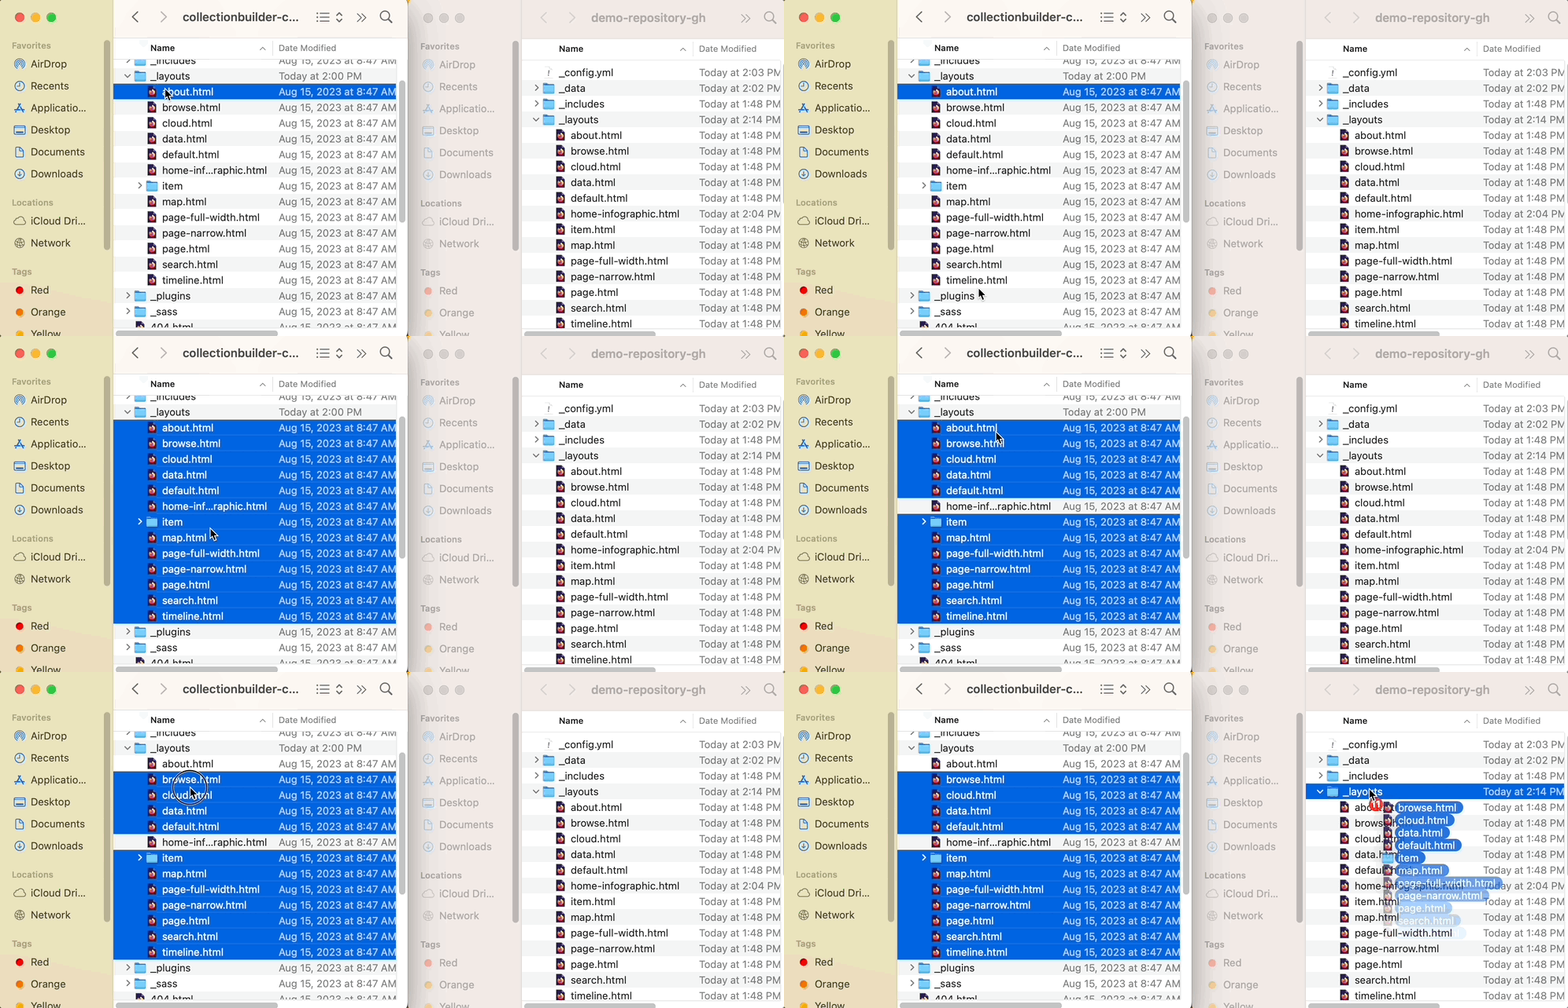
It is sometimes helpful to open the folders so you can be more precise about where you are dragging the files. If you are adding a file to the repository in general, and not to a specific folder, drag it to the very bottom of the window.
When prompted, you can click Apply to All and then click the Replace button to replace the files in the GH Repository with the new files from the CSV Transfer Repository.
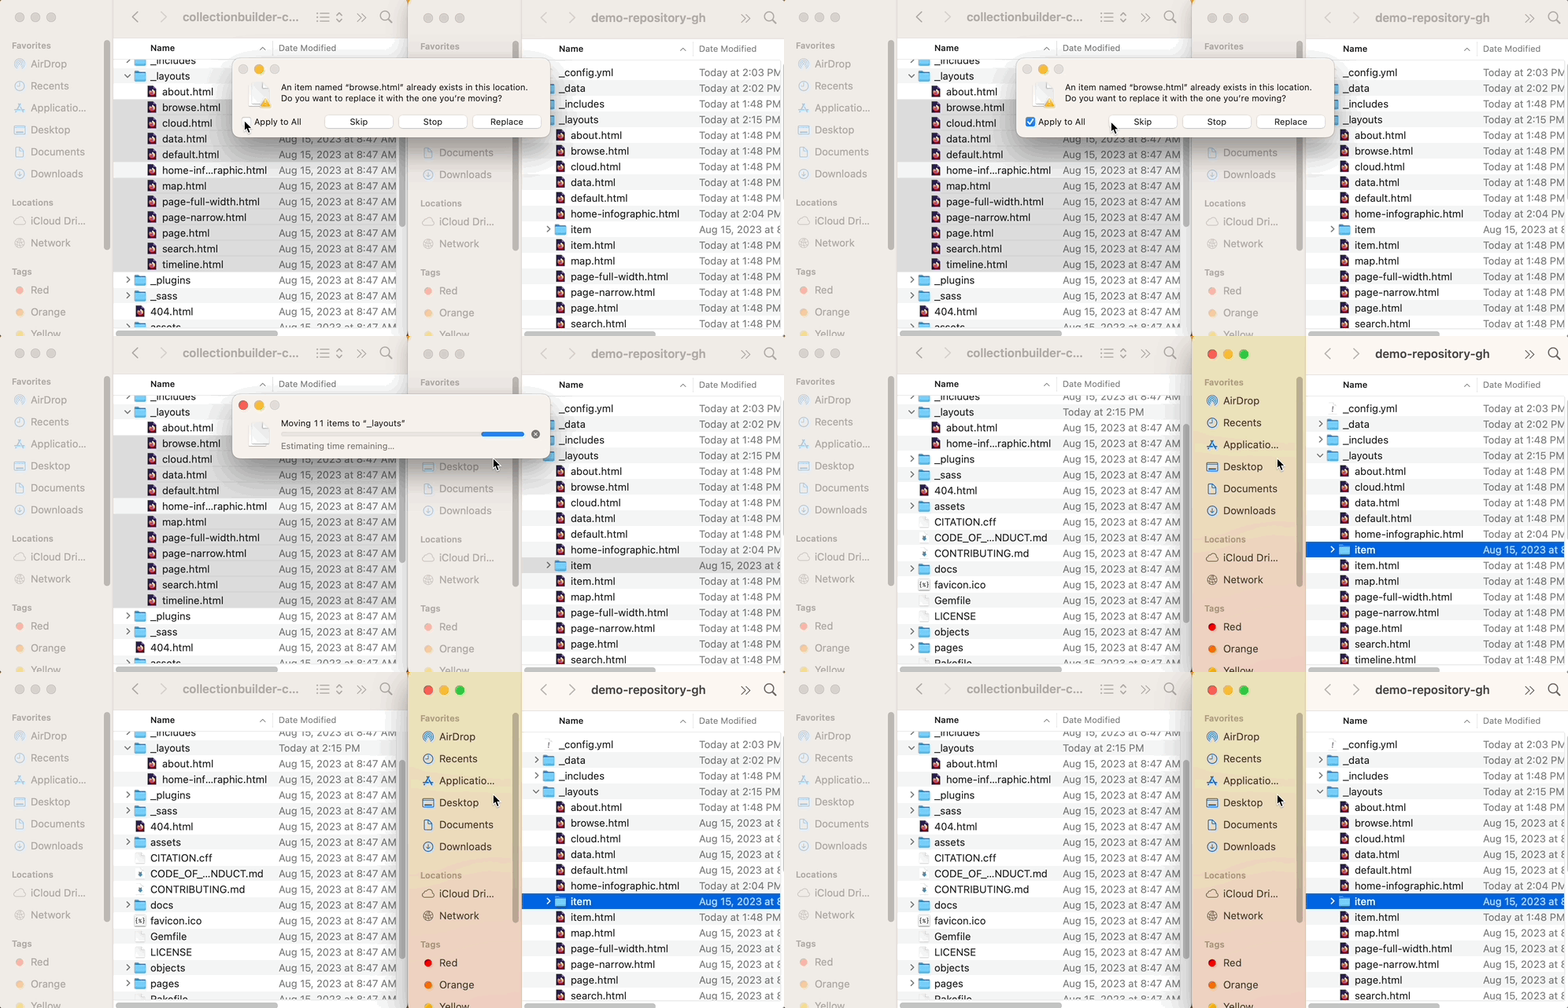
- Once you have finished dragging over everything, the CSV Transfer Repository should be mostly empty, except for the files that you left in your GH Repository (e.g., config.yml, the _data folder, the objects folder, etc.)
5. Delete a few files from the GH Repository
For your new CB-CSV site to work properly, you will need to delete the following four files:
- _layouts/item.html
- pages/item.md
- sitemap.xml
- index.md
Reminder: The sitemap.xml and index.md files are located in the root of the directory (not in a particular folder), whereas the item.html file is in the layouts folder and the item.md file is in the pages folder.
6. Generate image_small and image_thumb object derivatives
Important! In order to complete this step, you will need to install ImageMagick and Ghostscript on your computer. This software will enable you to use the rake generate_derivatives command.
Open your GH Repository in Visual Studio Code (VS Code) using GitHub Desktop. In the top menu, locate and click on Repository, and select the option, Open in Visual Studio Code.
- Alternatively, in the box that says Open the repository in your external editor, you can click the button that says Open in Visual Studio Code.
Open the terminal by clicking on Terminal in the top menu bar and then New Terminal.
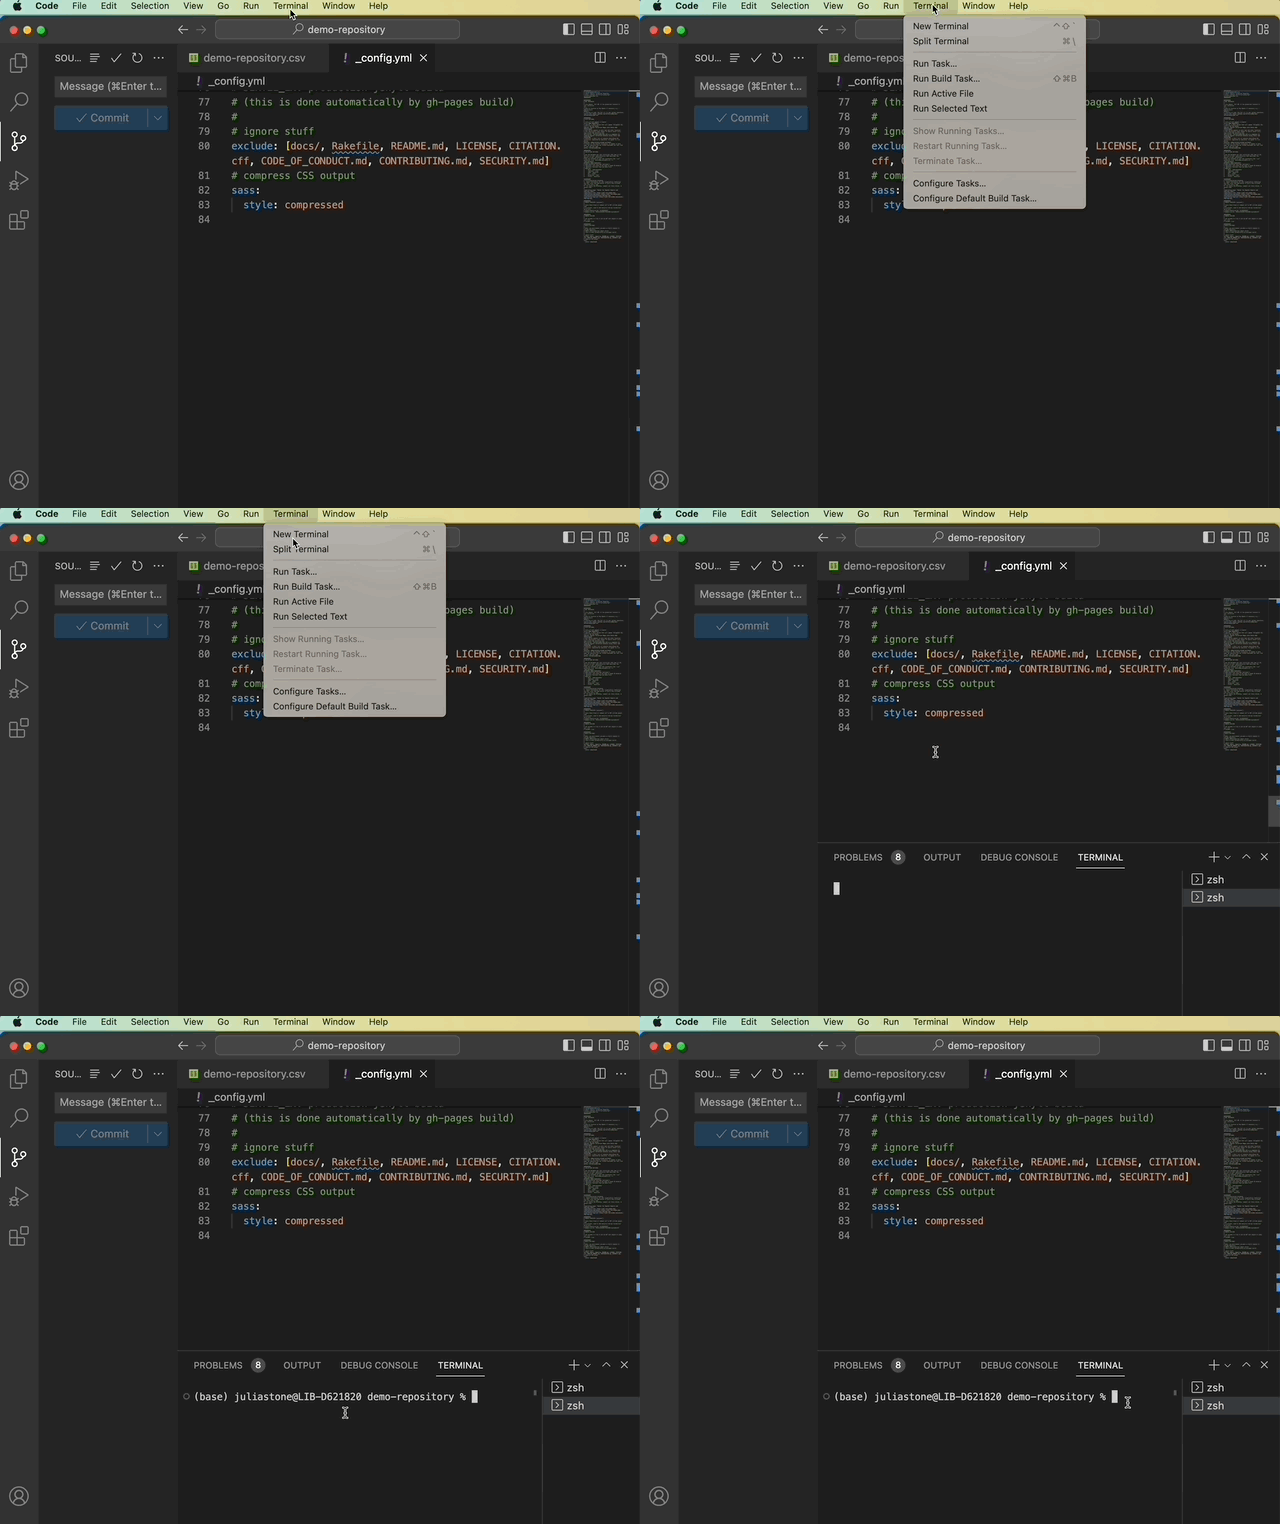
- Type the command rake generate_derivatives to create object derivatives for the objects in your collection.

Generating derivatives might take awhile if you are working on a large collection.
Check the terminal for messages from the task–it will alert you about any errors or files skipped (if there are duplicates, for instance). When the task is complete, your terminal’s command prompt will return.
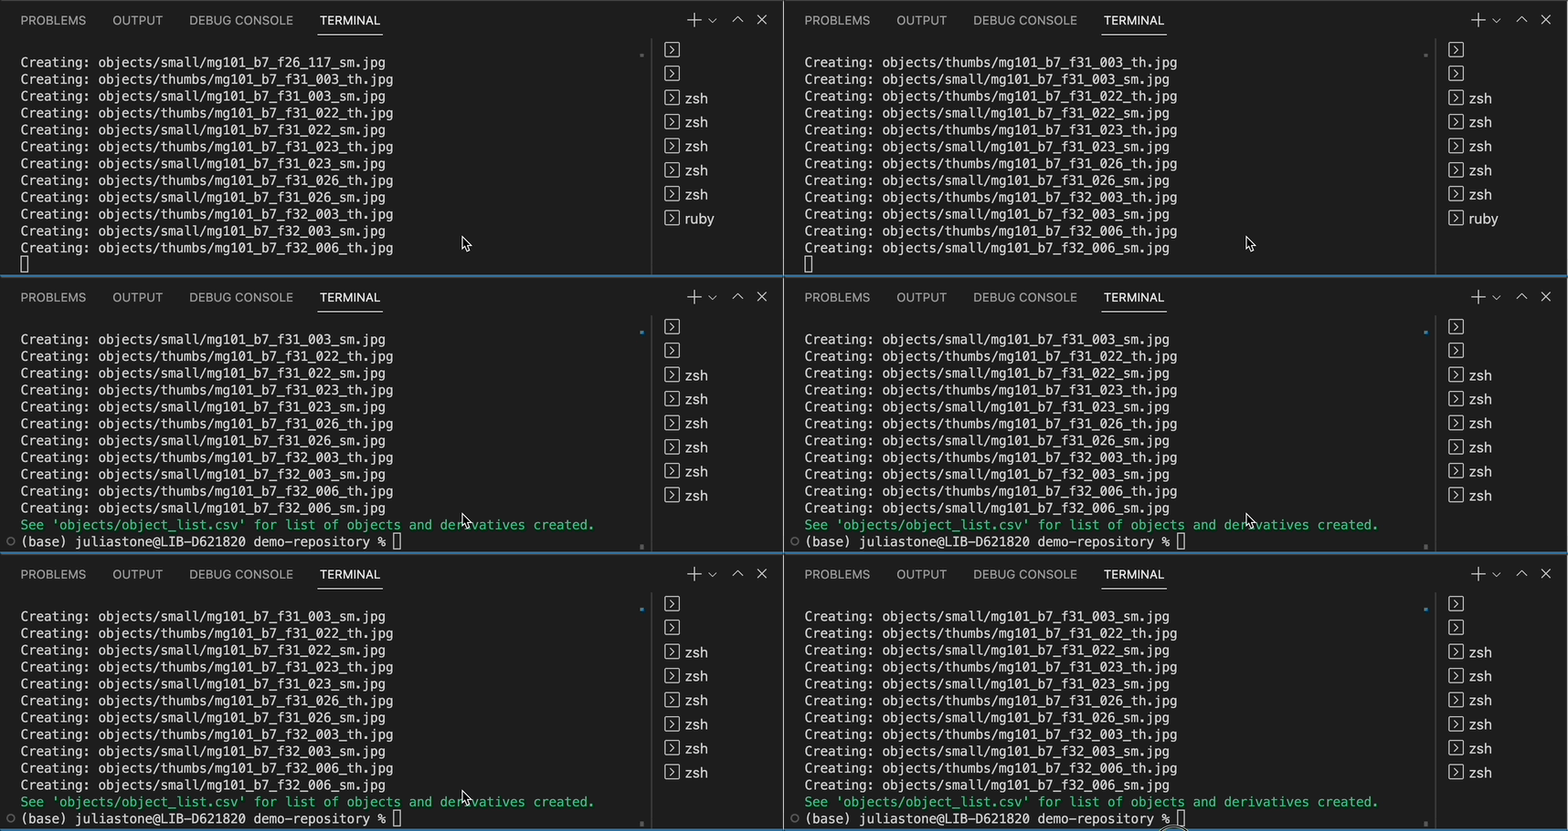
- You should be able to see your newly-generated derivatives in your repository’s objects/small/ and objects/thumbs/ folders.
7. Update your metadata spreadsheet
As the rake task is running, you can update your metadata spreadsheet in Google Sheets.
For your CB-CSV site to work properly, you will need to add the following metadata fields to your spreadsheet as new columns:
Learn more: You can read about how to fill in these fields in our CSV Metadata documentation.
- For help on filling in the image_small and image_thumb columns, you can also complete Steps 7-9 of our Object Derivatives Walkthrough.
8. Replace your CB-GH metadata with your new CB-CSV metadata
- Once you have finished filling in the new columns, download the metadata spreadsheet as a .csv file in Google Sheets by clicking File → Download → Comma Separated Values (.csv).
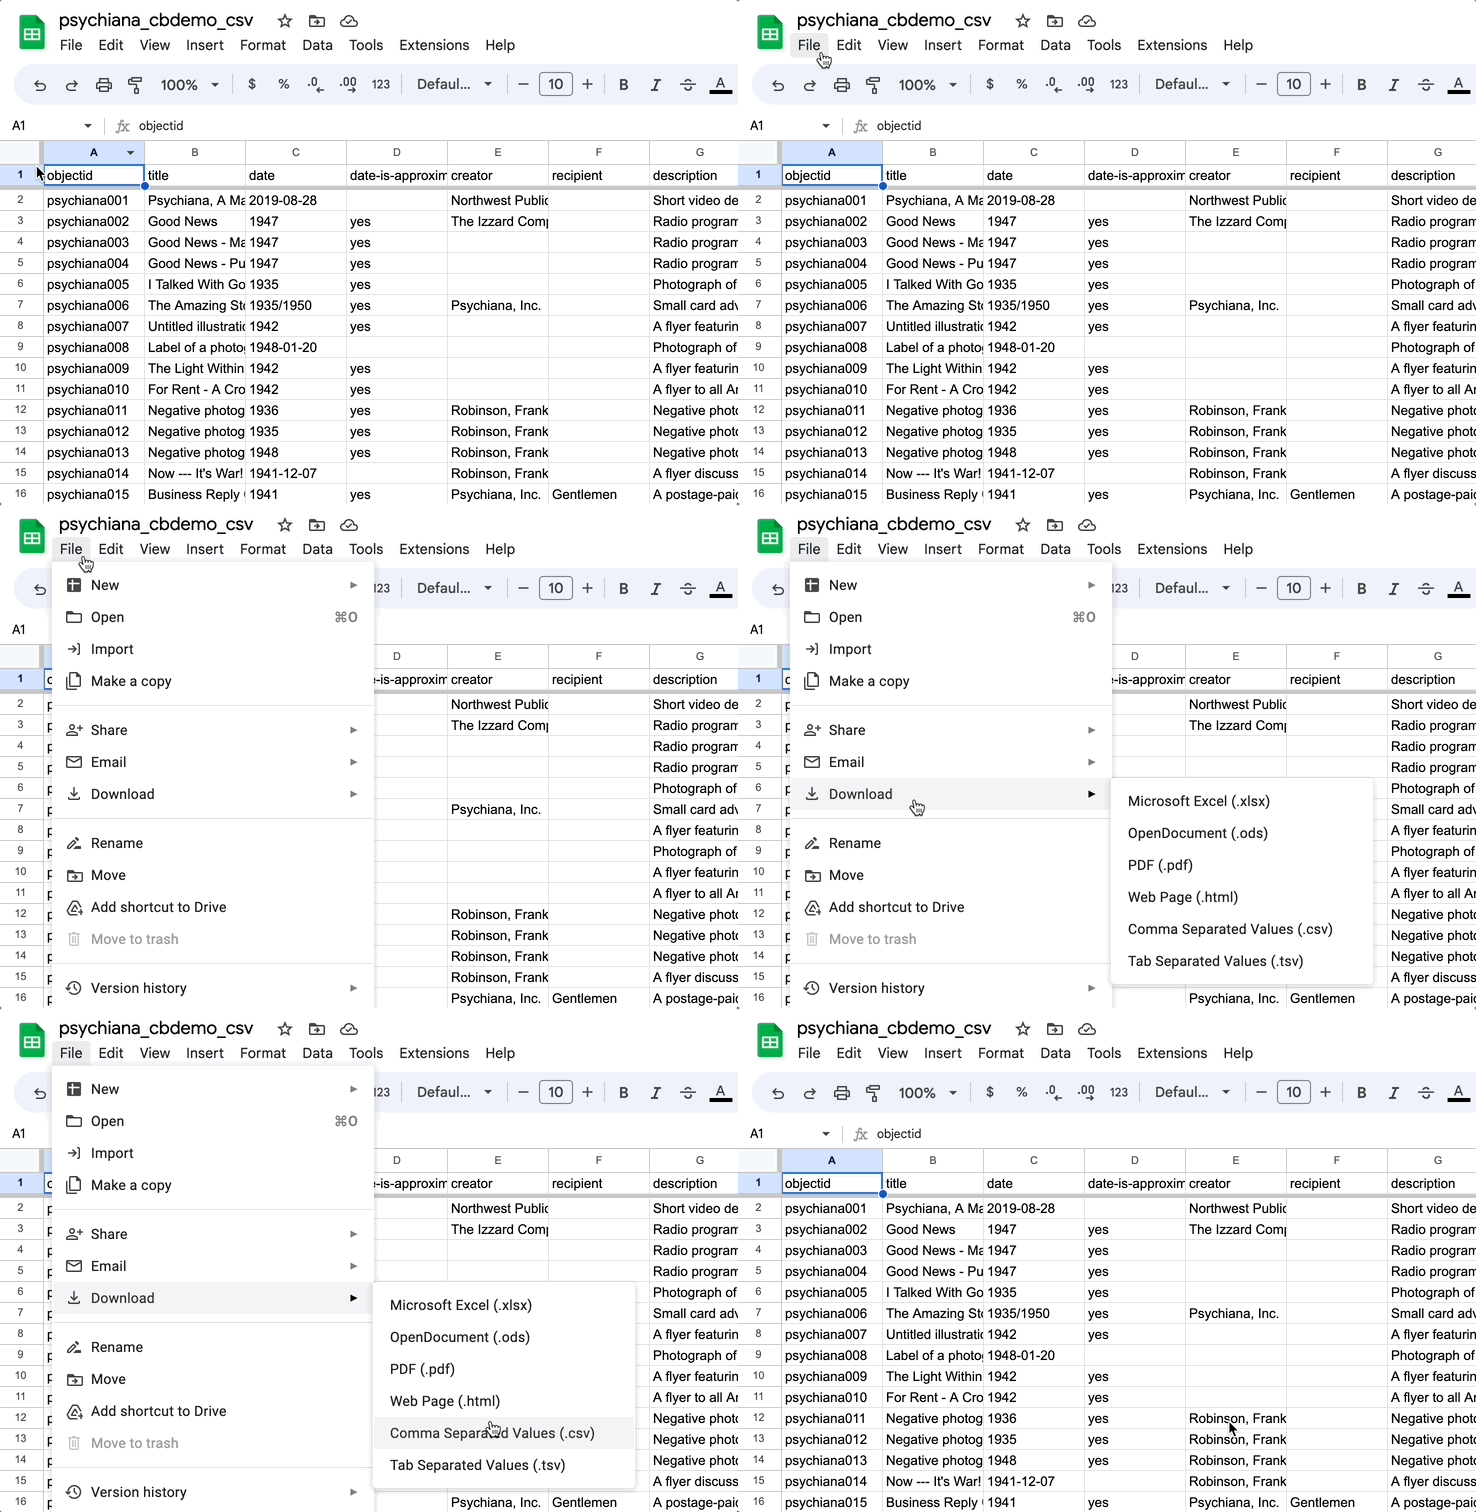
- Locate the file in the Downloads folder on your computer.
Warning: Do not open the CSV file to avoid issues with Microsoft Excel scrambling your UTF-8 encoding. Excel cannot correctly export a CSV for use with CollectionBuilder.
- Right click the file, hover over Open With…, and then click Visual Studio Code. This will open the csv file in Visual Studio Code.

Press Ctrl + A to select all the text in the CSV file. Then Press Ctrl + C to copy it.
Navigate to your current metadata csv file by clicking on it in the _data folder.
Press Ctrl + A to select all the text in your current metadata csv file and then press Ctrl + V to paste the updated CB-CSV metadata over the outdated CB-GH metadata.
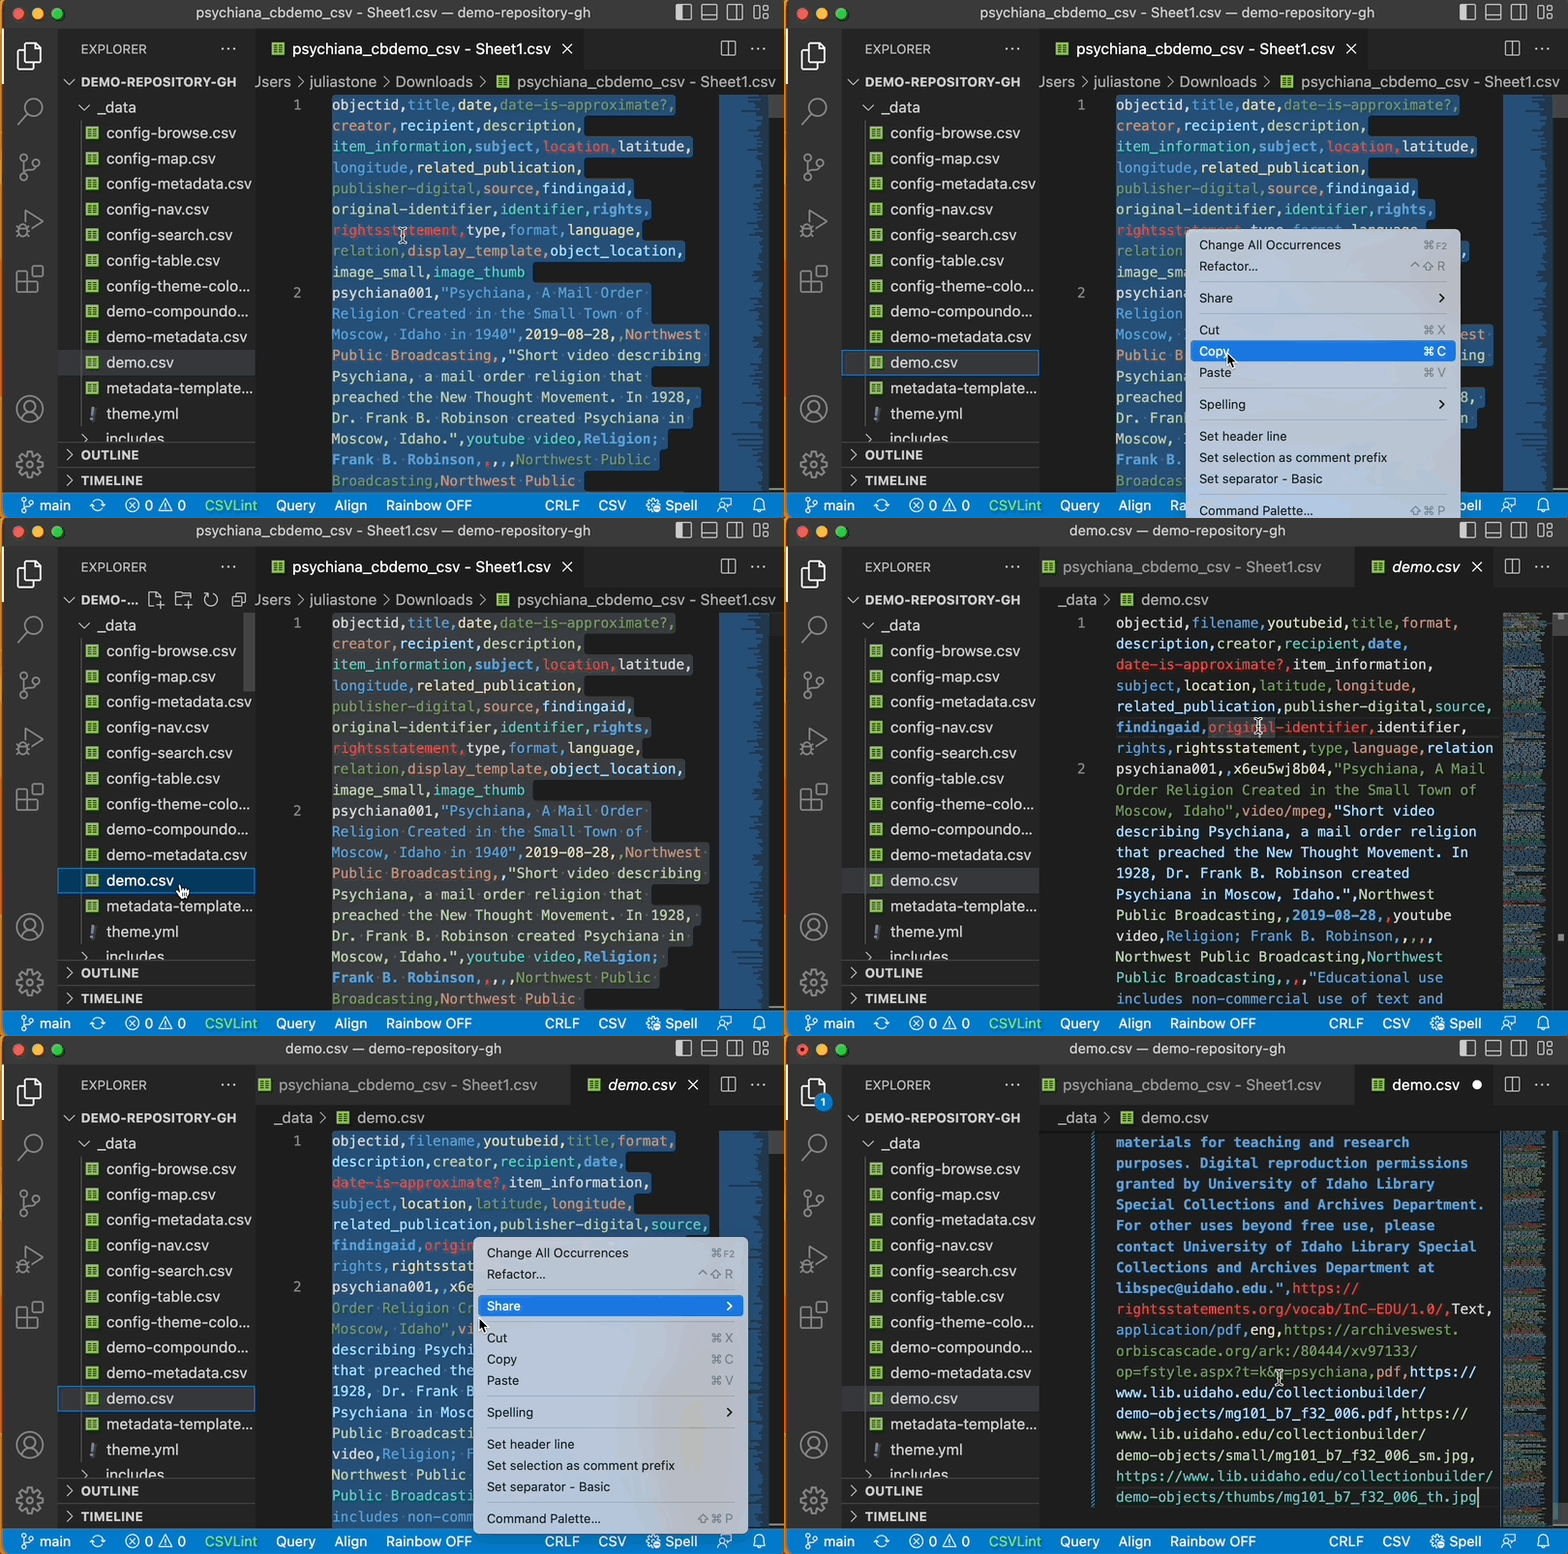
- Save your changes with Ctrl + S or by clicking File → Save.
9. Test your site to see if the transfer worked properly
In VS Code, open the terminal by clicking on Terminal in the top menu bar and then New Terminal.
In the Terminal, type the command bundle exec jekyll s and press Enter.
Important Note: If this is the first time you are working on this project in VS Code, you may need to type the command bundle install into the Terminal and then press Enter. This will enable you to generate your site on your local machine.
- You’ll see some text appear (messages from Jekyll), including a URL that appears after the title Server address:. The server address will typically start with: http://127.0.0.1:4000/.
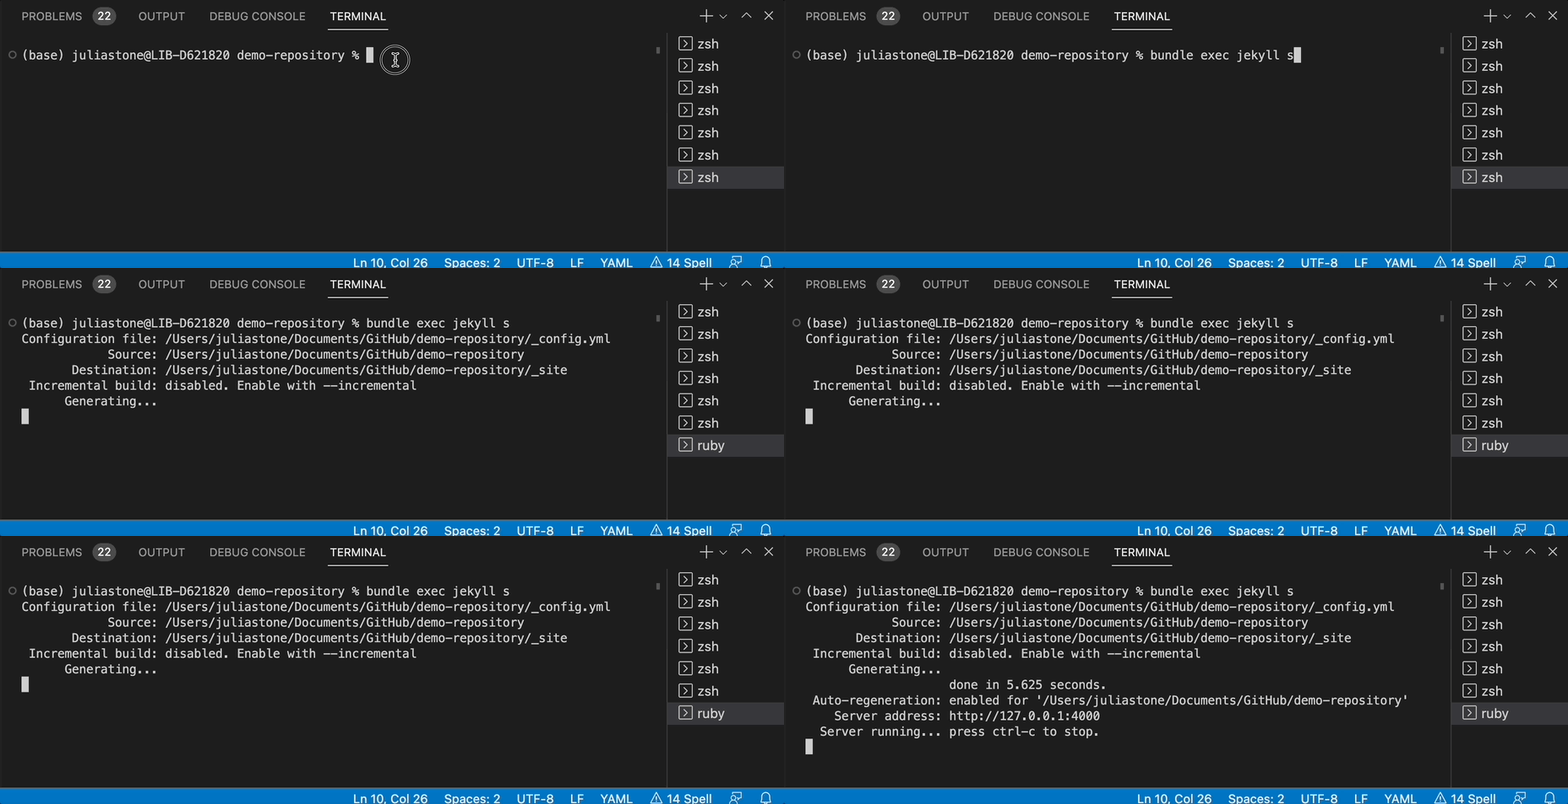
- Hold down Ctrl / Command and click the server address link to open the site in your browser, or copy the URL and paste it into a browser.
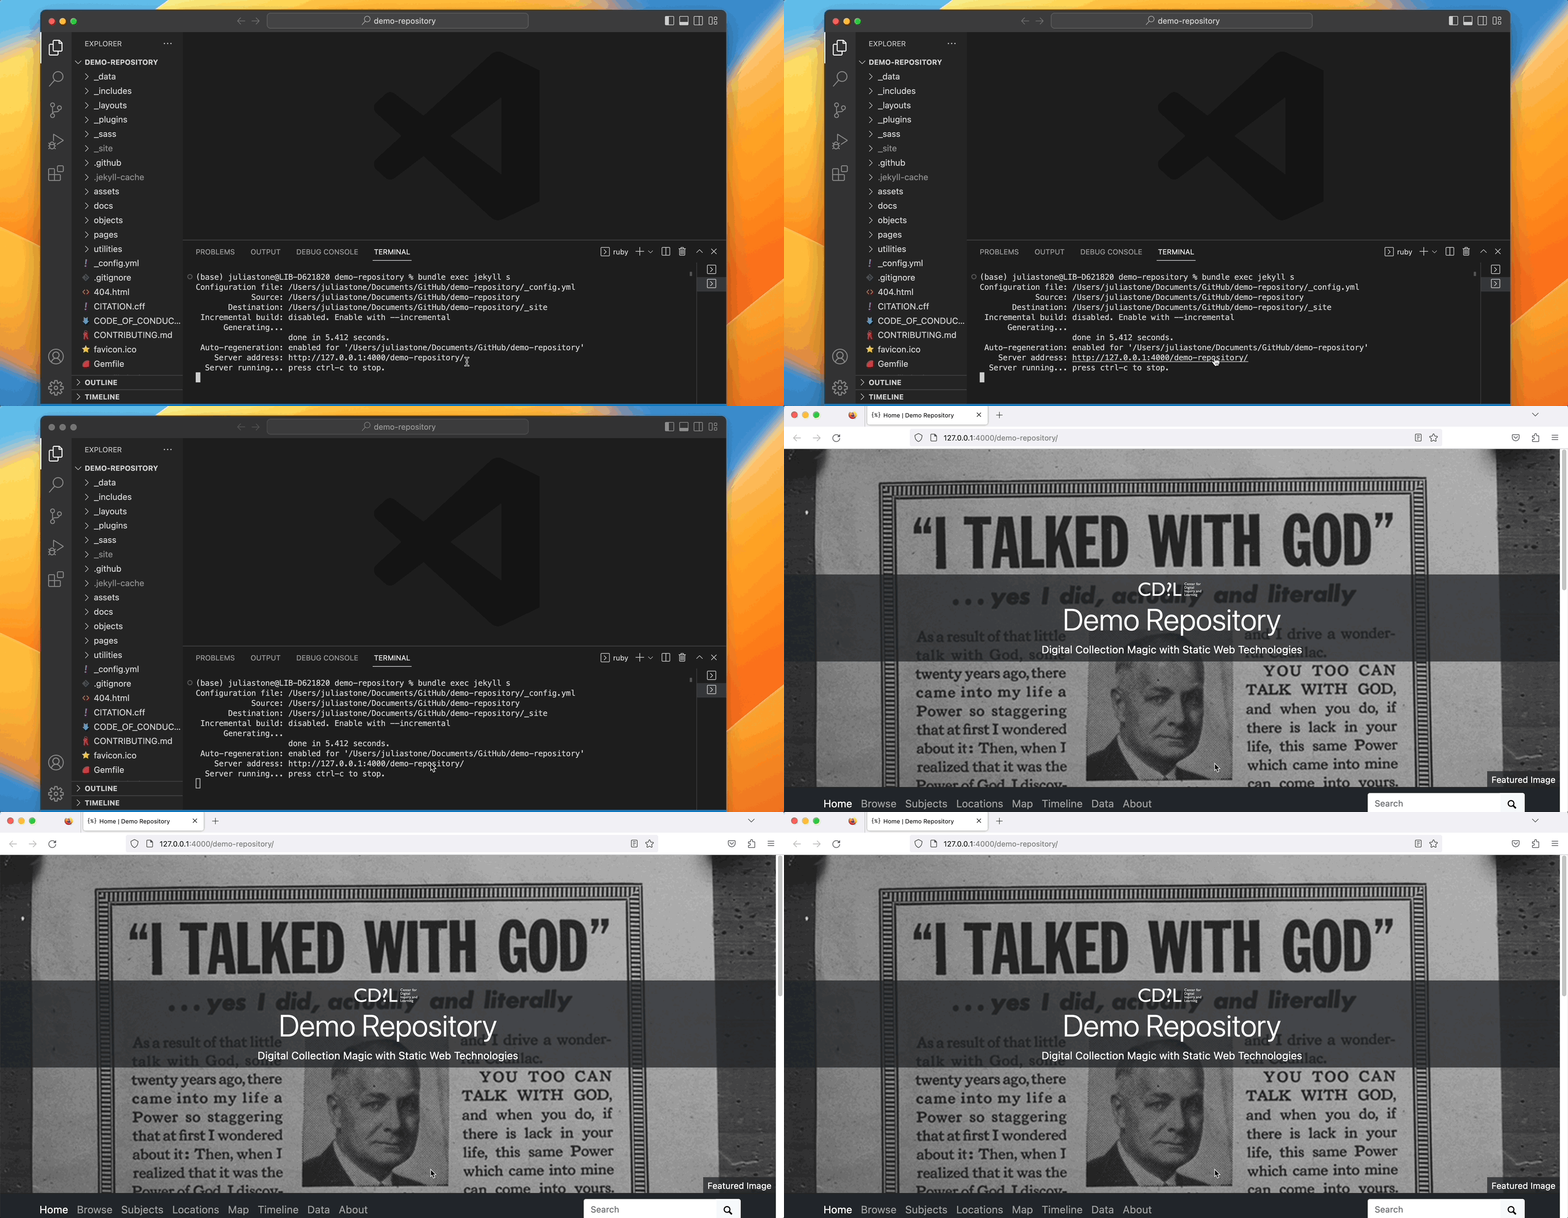
Browse through your site to ensure all the images are rendering properly.
When you’re ready to end your Jekyll session, type Ctrl + C into the Terminal to stop server from running.
10. Unpublish your GH Pages site
Before you commit and push your changes, navigate to the Settings tab of your GH Repository on the GitHub web interface. Then click Pages in the left side menu.
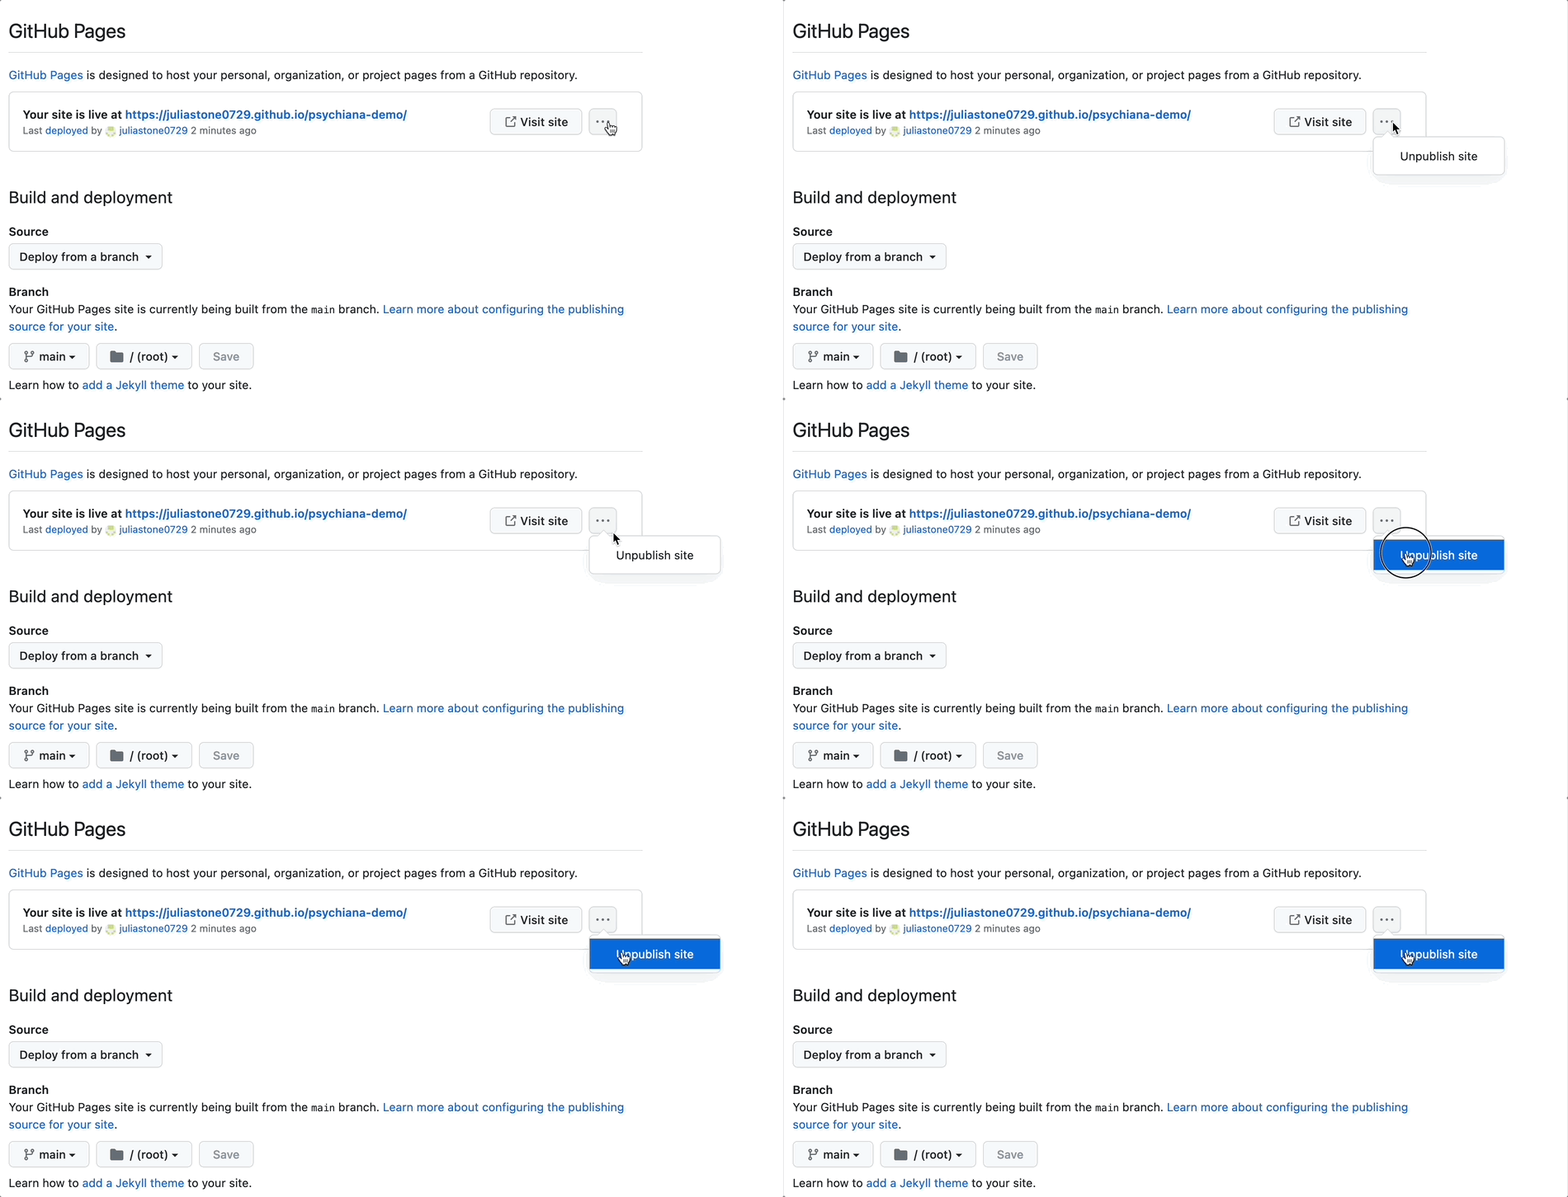
Next to the Visit Site button, click the three dots and then Unpublish site. This will allow you to rebuild your new CB-CSV site.
11. Prep your repository for publishing with GitHub Actions
You will be hosting your new CB-CSV site on GitHub Pages by setting up an alternative build using the GitHub Actions feature. Before using GitHub Actions, you have to prepare your repository for this build process.
In VS Code, open your “_config.yml” file. In the URL VARIABLES section, update the
urlandbaseurlvalues following this pattern:
URL: https://username.github.io
baseurl: /repository-name
For example:
URL: https://juliastone0729.github.io
baseurl: /demo-repository

- Save your changes with Ctrl + S or by clicking File → Save.
12. Stage and commit your changes in VS Code
Click on the Source Control panel in VS Code (i.e., the network icon on the left side).
Click the plus sign to stage all the changes.
Write a commit message (e.g., Transfer from gh to csv). Then click the blue Commit button.
13. Push your changes using VS Code
- In the same Source Control panel section of VS Code, click the blue Sync Changes button to push the changes to GitHub.
14. Rebuild your site using GitHub Actions
On the GitHub web interface for your GH Repository, click on Settings and then Pages in the left side menu.
On the Pages page, under Source, click the dropdown and select GitHub Actions.
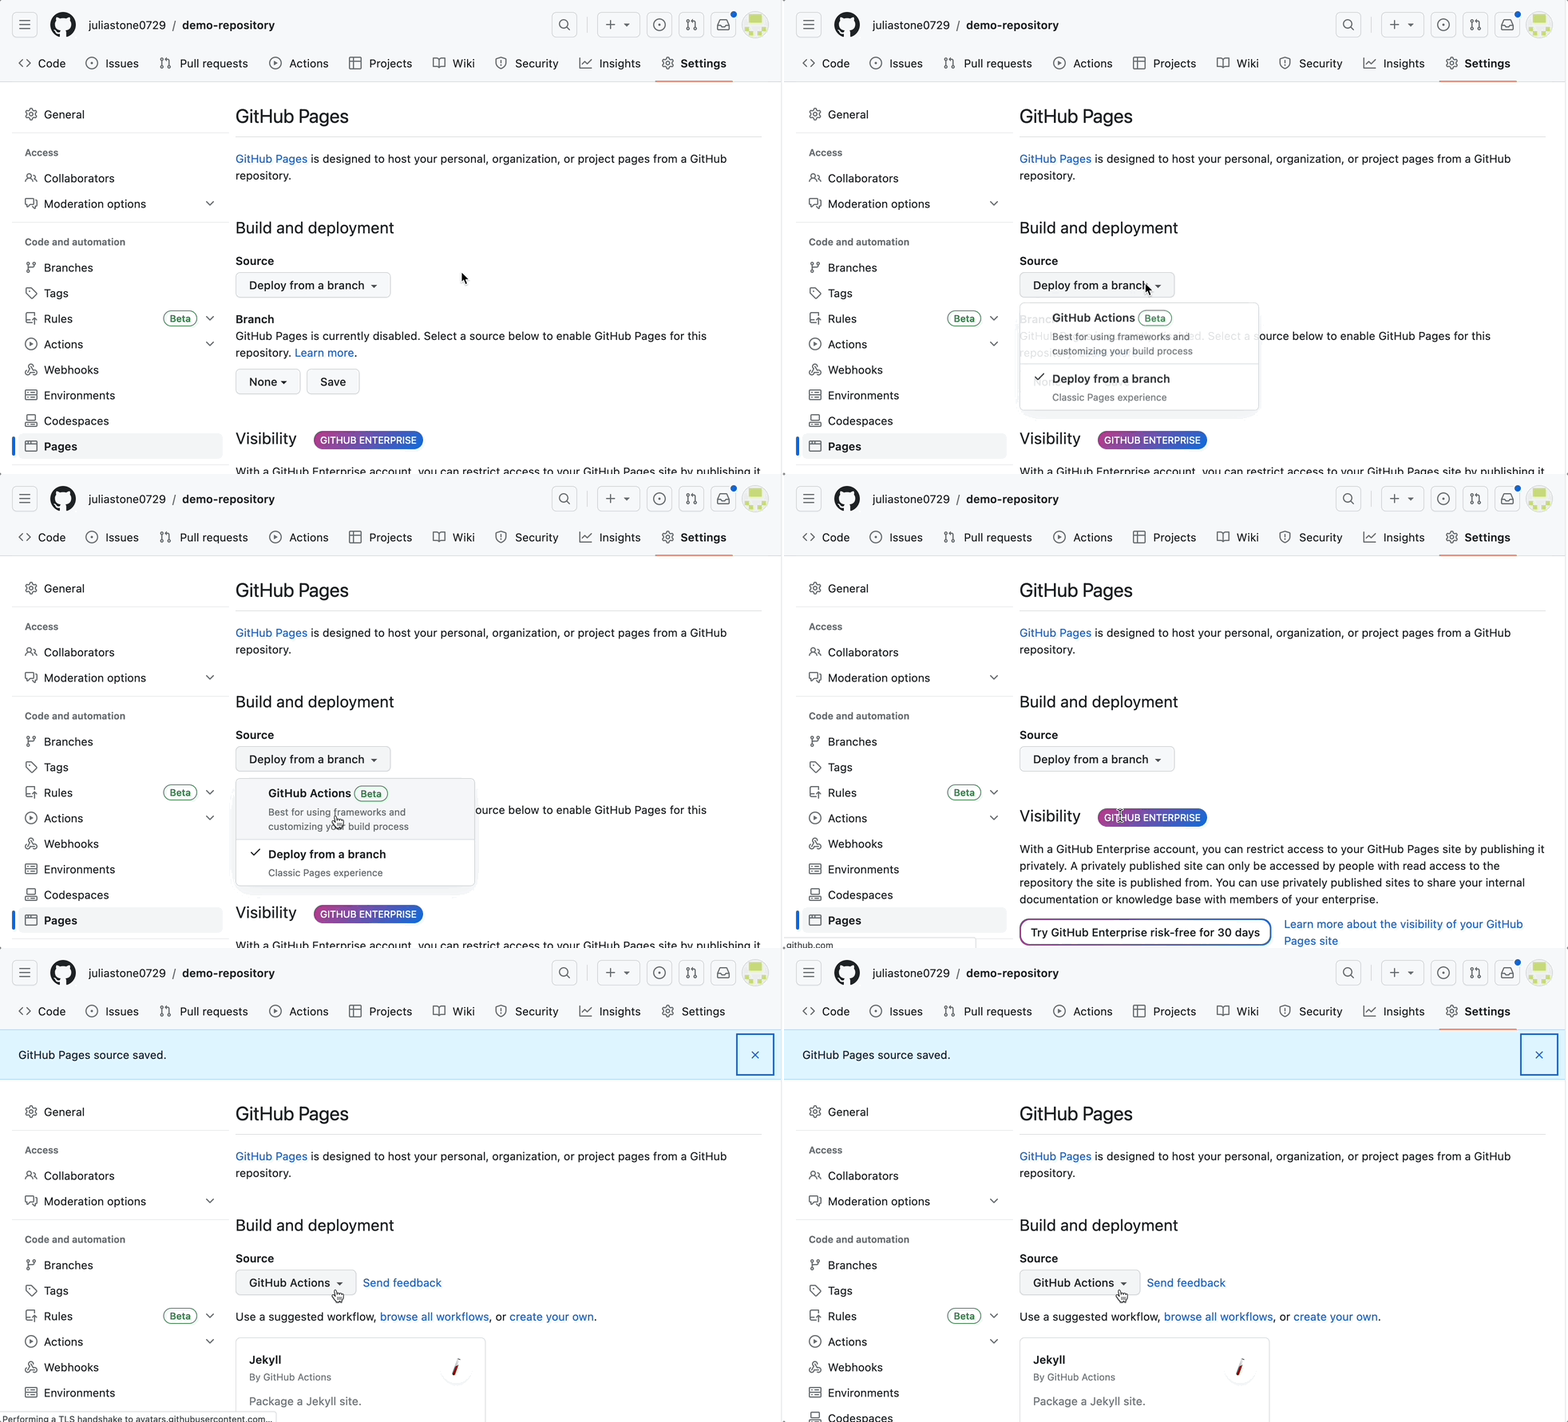
Warning: Some accounts may have GitHub Actions disabled by default. If you do not see the Actions tab in your repository’s navigation (in between Discussions and Projects), it will need to be turned on first. Visit the repository’s Settings, click on Actions in the left side nav menu, select Allow all actions, and click Save.
- Below the Source dropdown, a box will appear under Use a suggested workflow titled Jekyll. Click the Configure button.
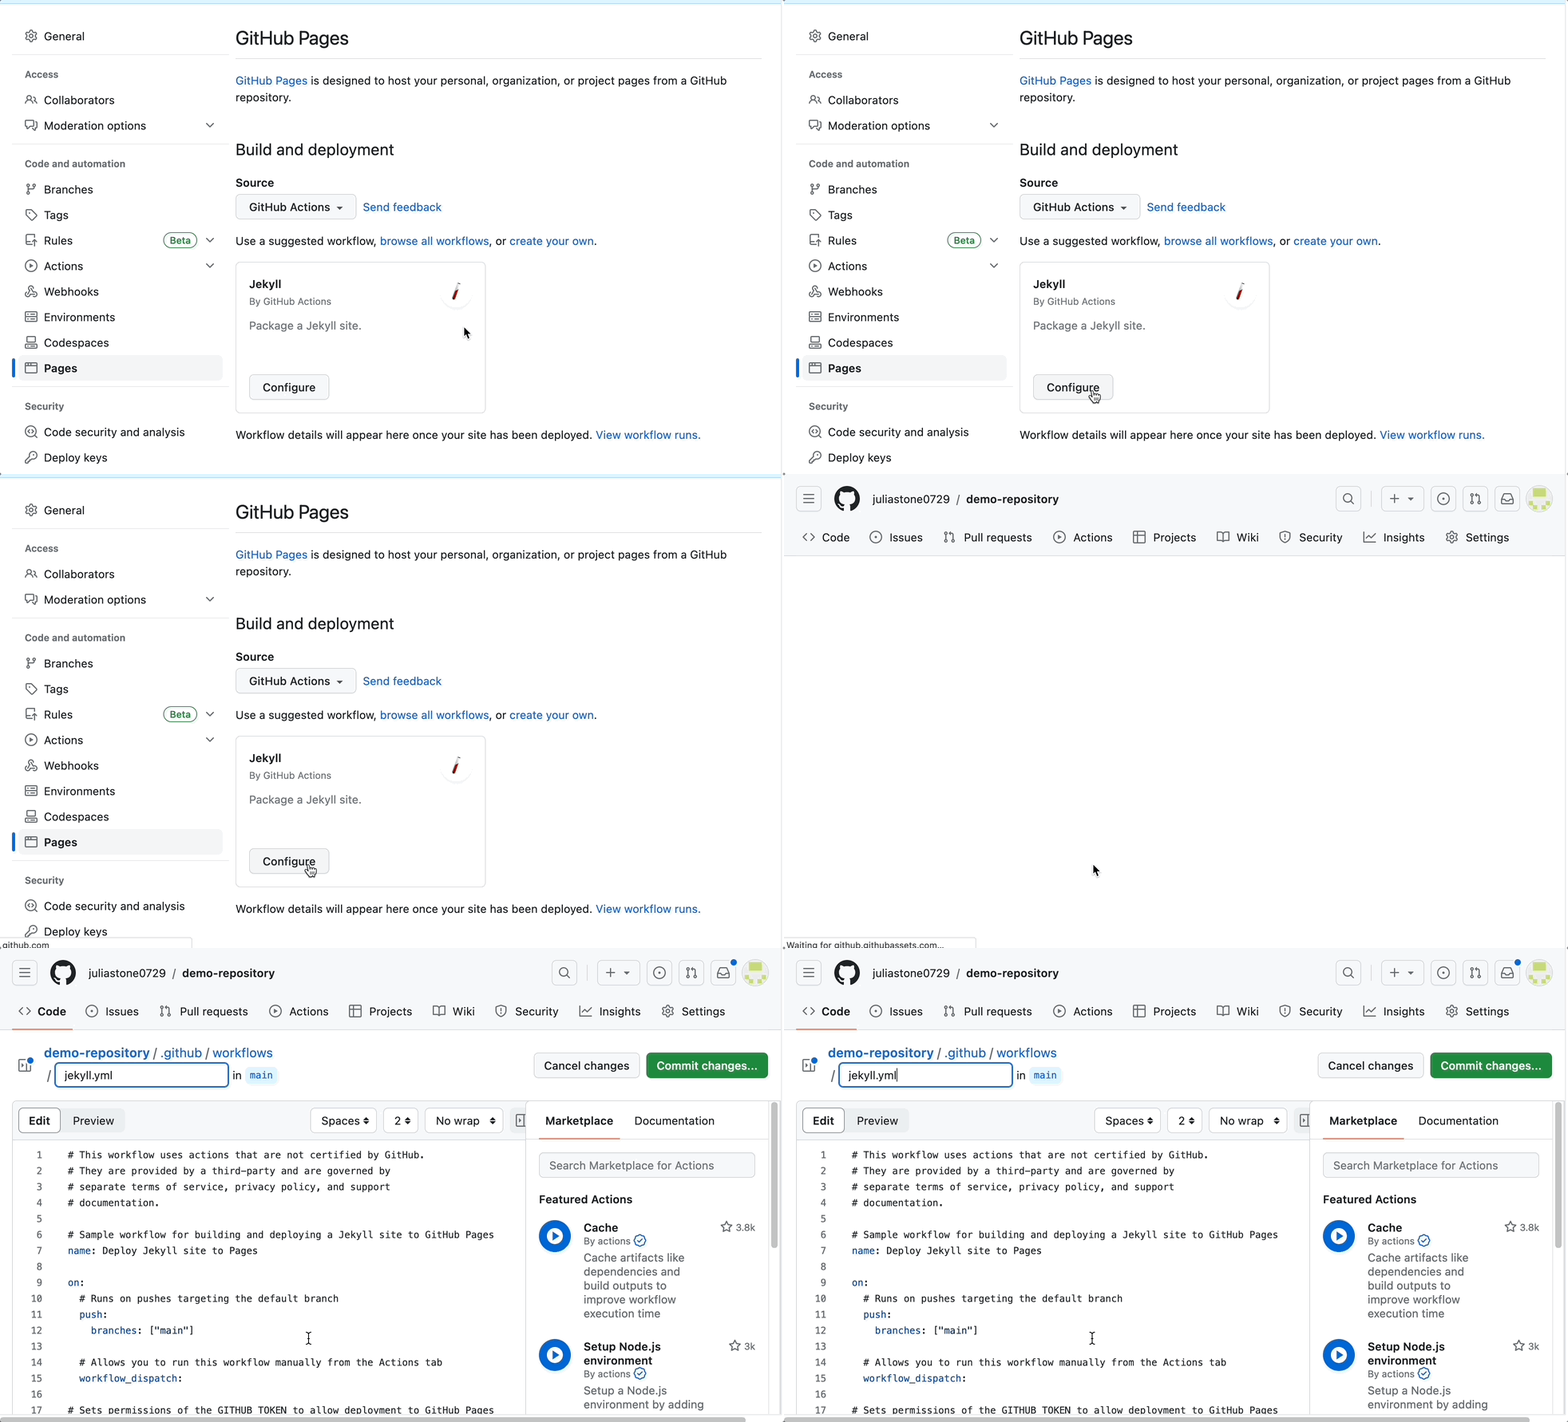
This will open an editor page creating a new file named “.github/workflows/jekyll.yml” populated with GitHub’s starter Jekyll workflow.
You can ignore the file and other options displayed on the right side, and just click the green Commit changes… button.
Write a commit message (e.g., Deploy site) and click the green Commit changes button.
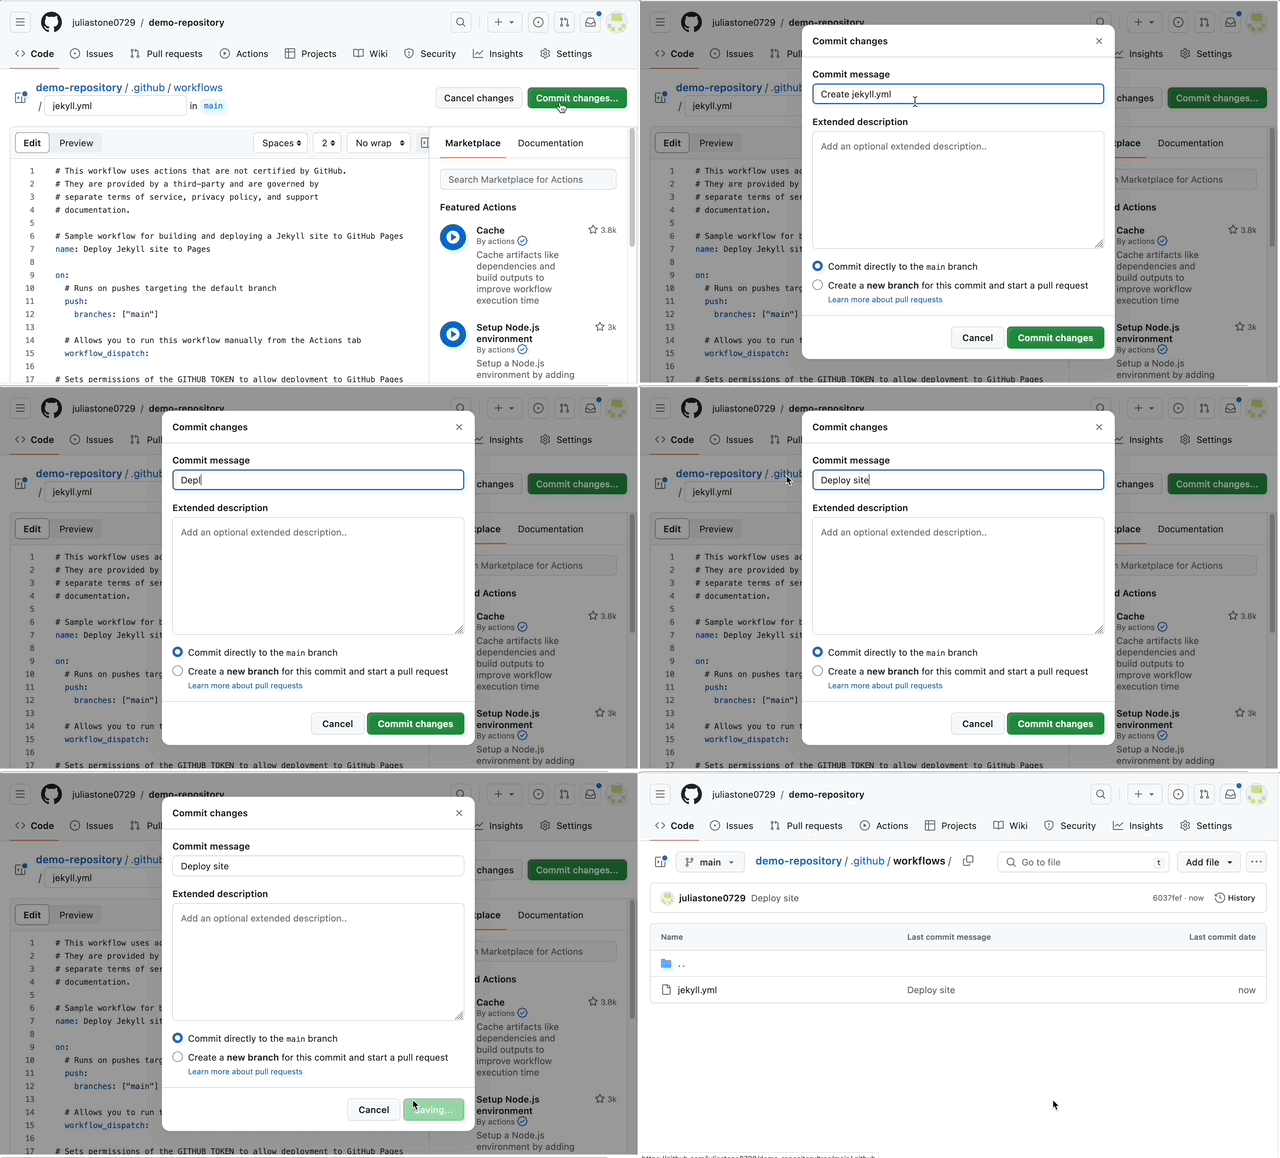
- Committing the action file to your repository will start the build process. It may take a few minutes for it to complete.
Troubleshooting: If a red “X” appears next to your commit, the build failed, and your updates will not be deployed – the last working version of the site will still be live. Visit the Actions tab to see detailed information about the error to help debug the issue. If the site was building fine on your local computer, this will be unlikely to occur!
Once the site is built, the orange dot in the Code section of your repository’s homepage will turn into a green check mark. Your new CB-CSV site should be accessible via the same URL as your CB-GH site.
Going forward, each time you push or directly commit to the repository, GitHub Actions will rebuild the live site.
